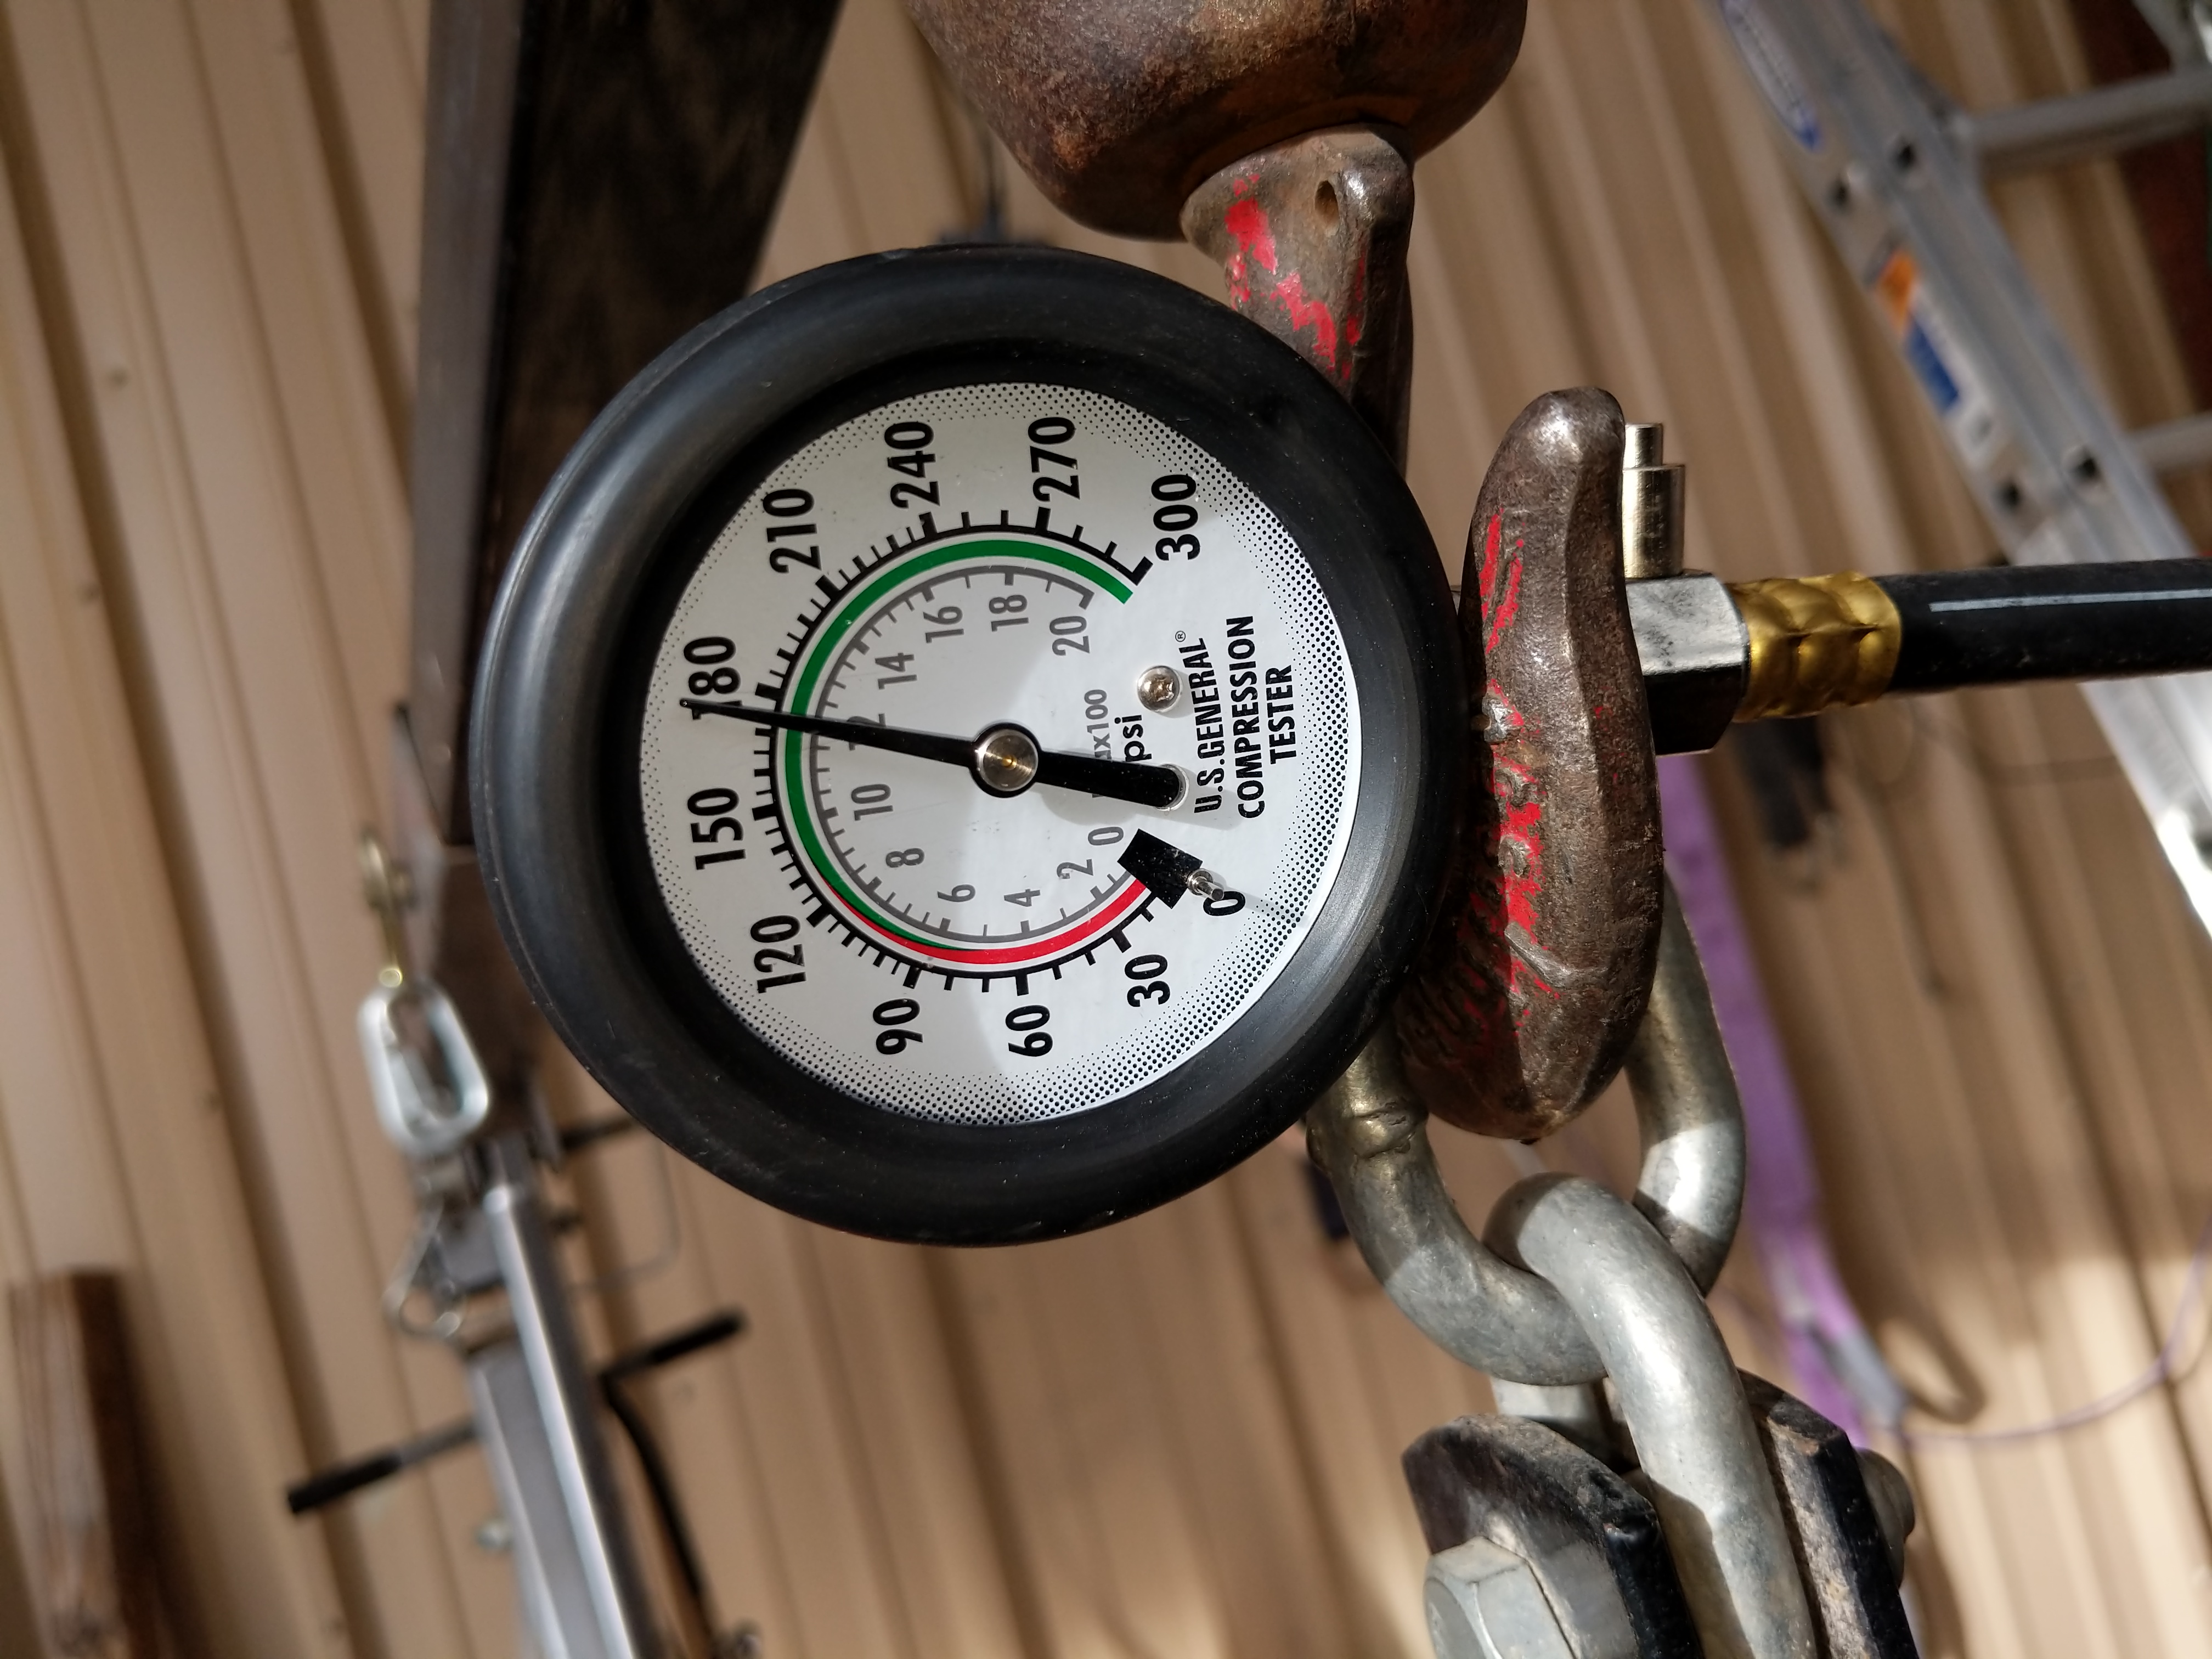
I ran another compression check and then a leak down test on each cylinder. There was quite a bit of leak down, some cylinders were at 50% at the bottom of the stroke and over 30% at top dead center on the compression stroke. All of the leak down was past the rings, valves looked OK so time to pull the motor and take it to the local machine shop that has done Nailheads before so off to Morrison Auto Machine in Glendale AZ for a refresh.
Author: oldschoolgasser
I am retired communications engineer with bad hobbies (those that are addicting and expensive. I have been a gear head since high school. Published a short Story in Southern R odder in the early 70's about my gear head frenemy and my 1957 Dodge D500 and his Moms 60 Ford 4 door
The Nailhead Runs…..Sort of
Getting the motor ready to test fire required finding top dead center on the #1 cylinder with compression and installing the new rebuilt distributor with new points, rotor, condenser, cap and plug wires so that the rotor points to the #1 plug on the cap. I installed a rebuild AFB carb and hooked up the fuel from the tank to the pump to the carb and rigged up a temp start and ignition switch. A little started fluid to get things going and turning it over to make sure that the fuel pressure come up and it did kind of fire. I check the timing with the timing light and found that the coil and coil to cap wire were bad. Replaced the coil and coil wire and tested the timing again, Timing light flashes on the coil wire and on every spark plug lead. I installed a new set of Delco R45S plugs and sort of fired it up.
Not exactly the sound I was expecting but it did fire all of the cylinders a couple of revolutions but it doesn’t idle or even run at any fixed RPM for long so…………
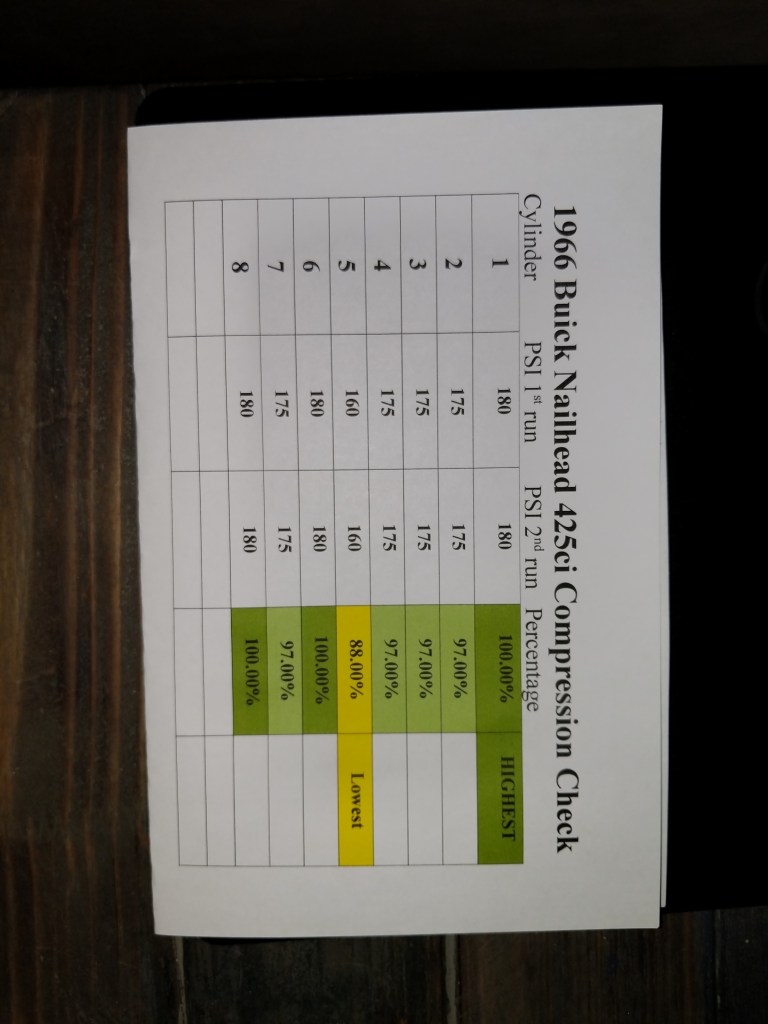
I pulled the plugs. They did not look good, black oil deposits on the tips. While the plugs were out I ran a compression check again on all cylinders, a little variation from 225 to 175 lbs but not bad enough that it should not run so time to dig in a little deeper.
Evaluation Time
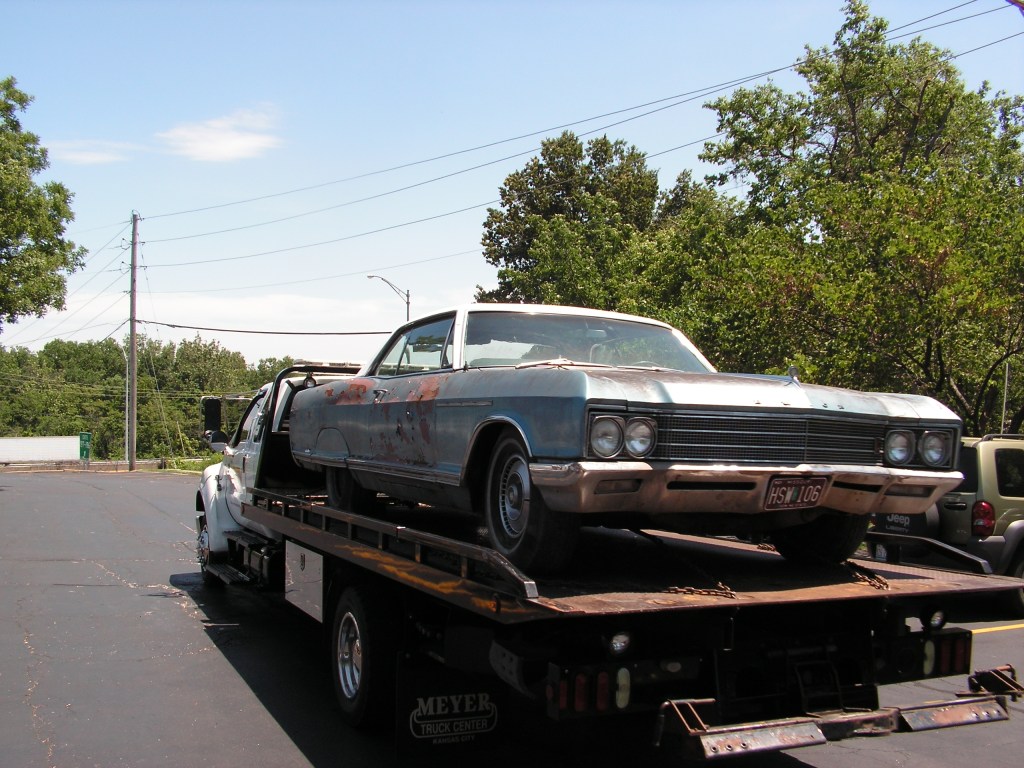
The 425 Buick Nailhead from the 1966 Buick Electra 225 was from a car I purchased in St. Louis for a thousand buck and moved to Vancouver WA The motor ran and the transmission worked before I pulled the engine out
Fundumentals
Back to basic checks for the Nailhead. It has been over 20 years since the engine last ran and some of that was in the Arizona heat so a basic check of the internals of the engine are in order. Before I tried to start is I had oiled the combustion chambers with Marvel Mystery oil and turned the engine over by hand with no problems. I had done all of the basic of starting an old motor but the oily plug tips need more investigation.
Cylinder leak down testing
Although the compression checked sort of OK a better test is a leak down test so that is up next. Pulled all of the plugs, blocked open the throttle and opened up the valve covers to get a view of what was going on and pulled the dip stick so I could listen while checking for leaks.
But will the engine run???

The last time the nailhead ran was before I pulled it from the 1966 Buick Electra 225 that I bought in St. Louis and moved to Vancouver WA to remove it and the TH400 switch pitch transmission and moved it to my garage in Arizona and painted it and the accessory front drive alternator and the tested radiator and new hoses and a new thermostat and installed the whole package with the transmission in the the frame with new motor mounts and transmission mount.
I prepared the engine for testing by pulling the plugs, putting some Marvel Mystery Oil in each cylinder and made sure the engine was free by turning it over by hand with a socket on the crank and a breaker bar.
I primed the oiling system with a drill turning the oil pump and check the pressure at 40lbs and let it run a few minutes while turning the engine over my hand again.
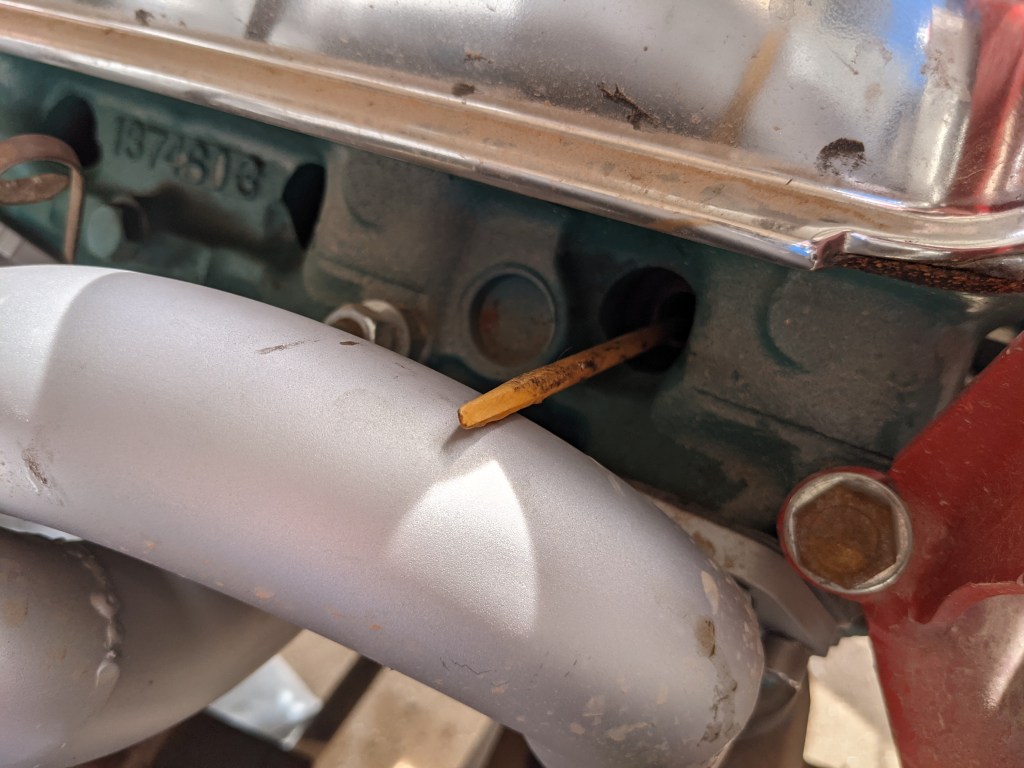
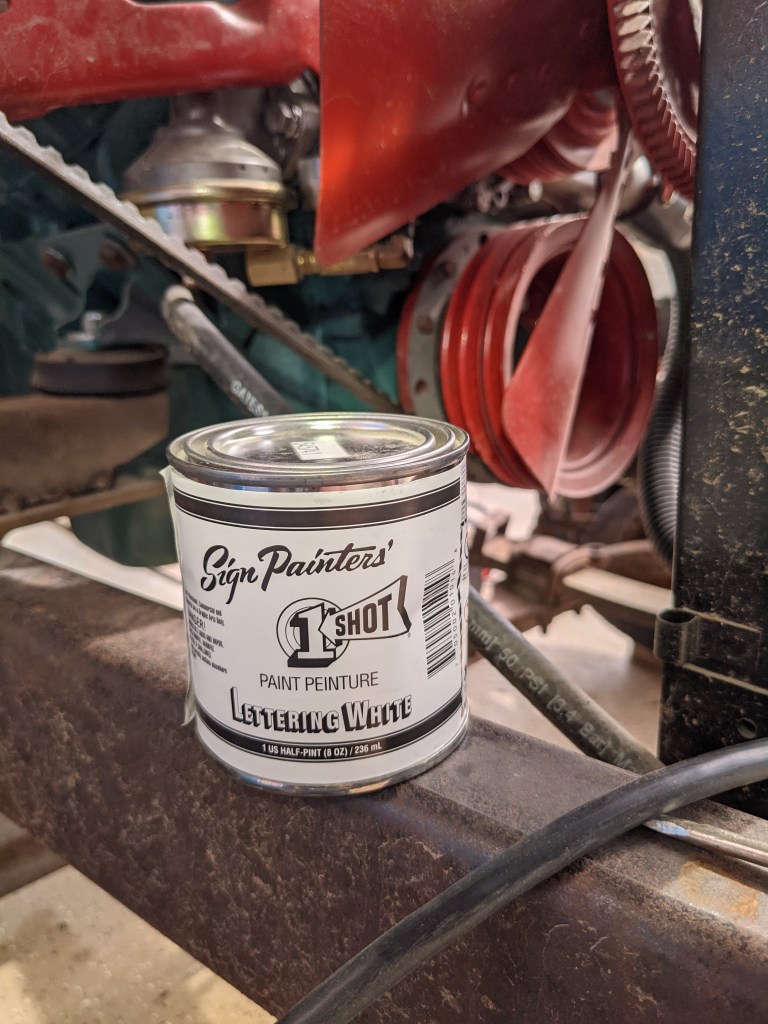
With that all checked out I found top dead center of the piston in cylinder #1 by turning the engine over by and with a stick touching the top of the piston that I could watch while rotating the engine. With the stick at the top of its travel I check the timing mark on the crank balancer and it was right on zero so I cleaned it off and painted it with some white one shot.
Next step was to check the compression so I rigged the battery to the starter and filled the moon gas tank with some high-test to see if the fuel pump worked too.
The compression in each cylinder looked OK and the fuel filter and carburetor were getting fuel and the accelerator pump on the carb was squirting so all I needed now was spark. With the #1 cylinder at top dead center I dropped in the electronic distributor and marked the cap where the rotor pointed as #1. I left the distributor bolt down tab a little lose so it would rotate easily for setting it timing when (I hope) she fired off.
I wired an ignition on/off switch nest to the temporary starter panel switch to power the ignition system and mounted the new coil and ran the new spark plug wires and installed new plugs and hooked everything up. I pulled the plug wire off of the #1 cylinder and turned off the fuel to the engine and tested to see if I had spark while turning the engine over with the starter and the ignition on
I removed the three bolts holding the transmission torque converter to the flex plate and made sure it was free of the engine.
Time to see if this puppy would run!
I got out the fire extinguisher and the starter fluid spray can and checked the oil and fuel filter again.
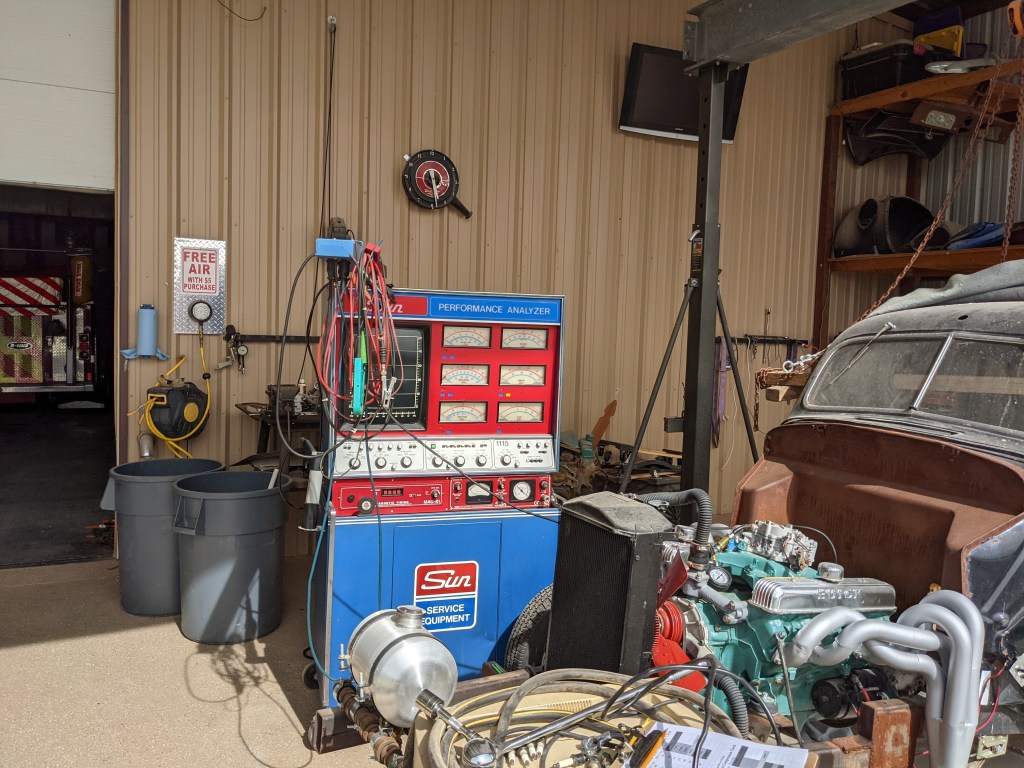
I rolled out the Sun Engine Analyzer that I bought last year form a High School Vocational Training program for $143 at the surplus auction and hooked up the timing connections, RPM, Vacuum and spark scope leads to the engine. So the moment of truth is at hand.
Need Suck, Squeezy, Spark and Bang
With Compression and fuel all I needed was an ignition spark at the right time and she should try to start. I installed the new electronic distributor, coil, and wired power via a ignition switch next to the temp starter switch and tested it all with my timing light, when I turned on the ignition and hit the start the coil wire high tension lead was firing the light.
Heavy Heavy FUEL
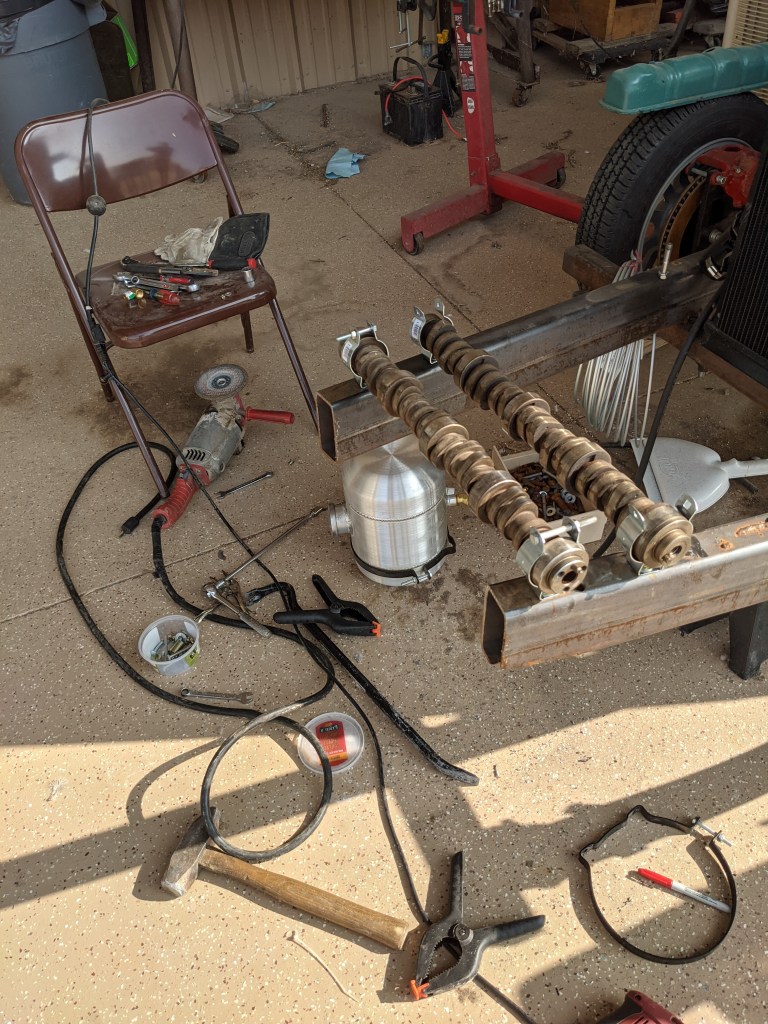
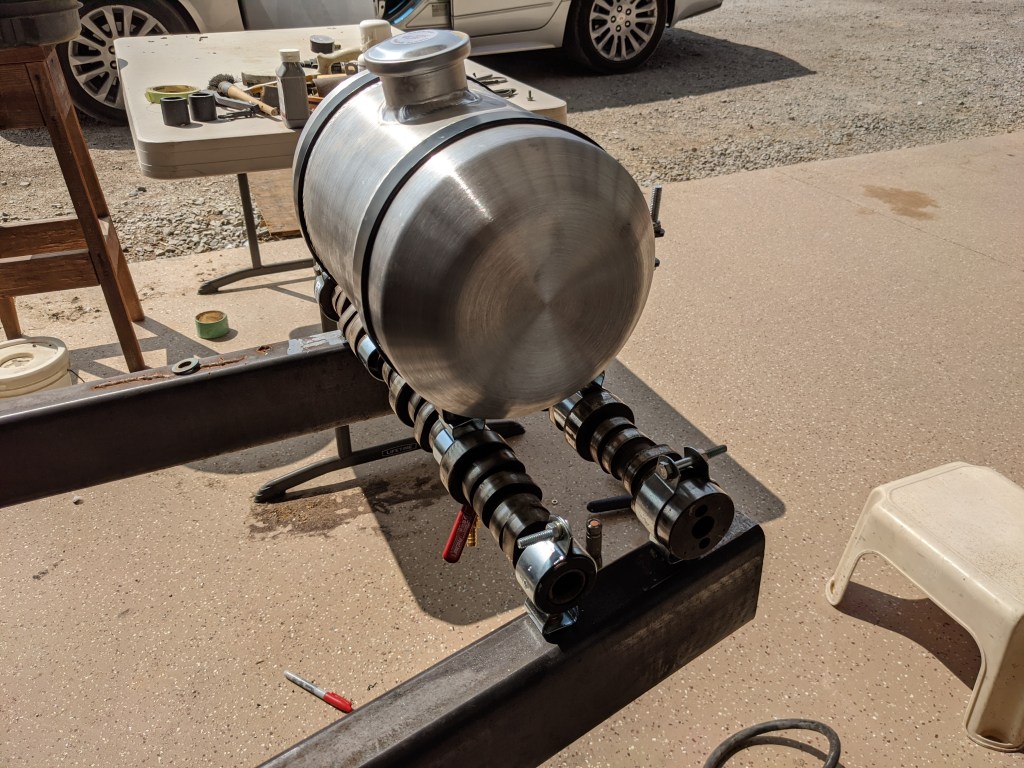
Almost ready to get the motor running so it is time for getting the small fuel tank installed and hooked up to the fuel pump
First thing is installing the mounting for the tank as far forward as possible to leave room for the front clip.
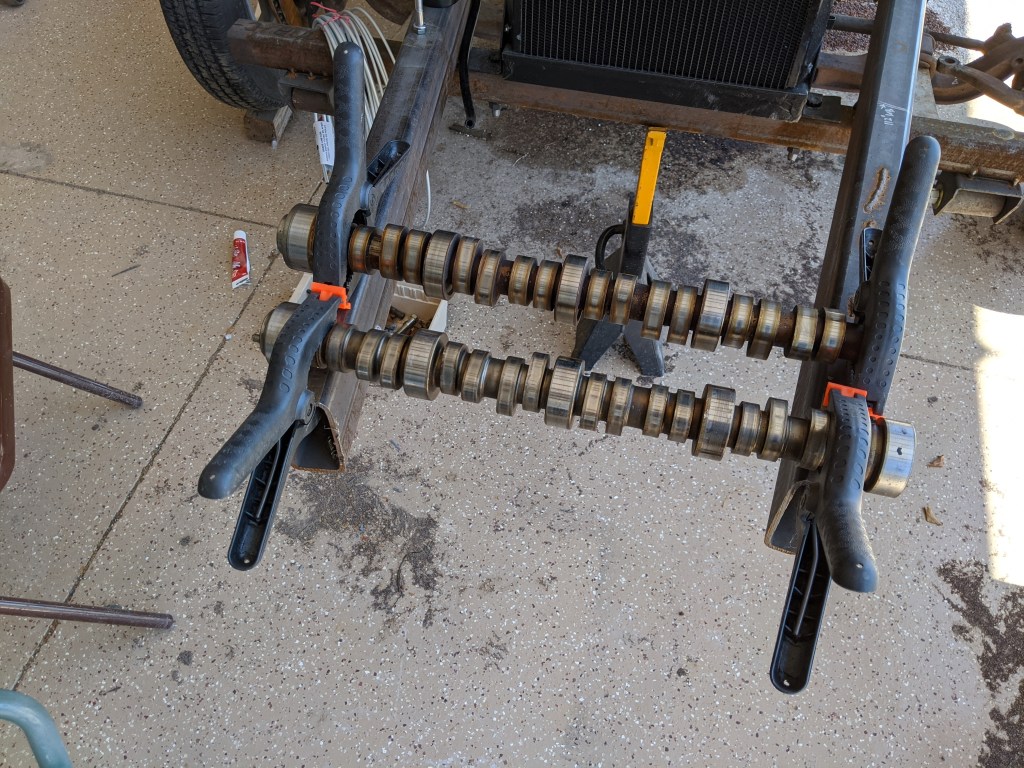
I picked up a couple of old cam shafts from a engine rebuilding shop here in Phoenix, no charge
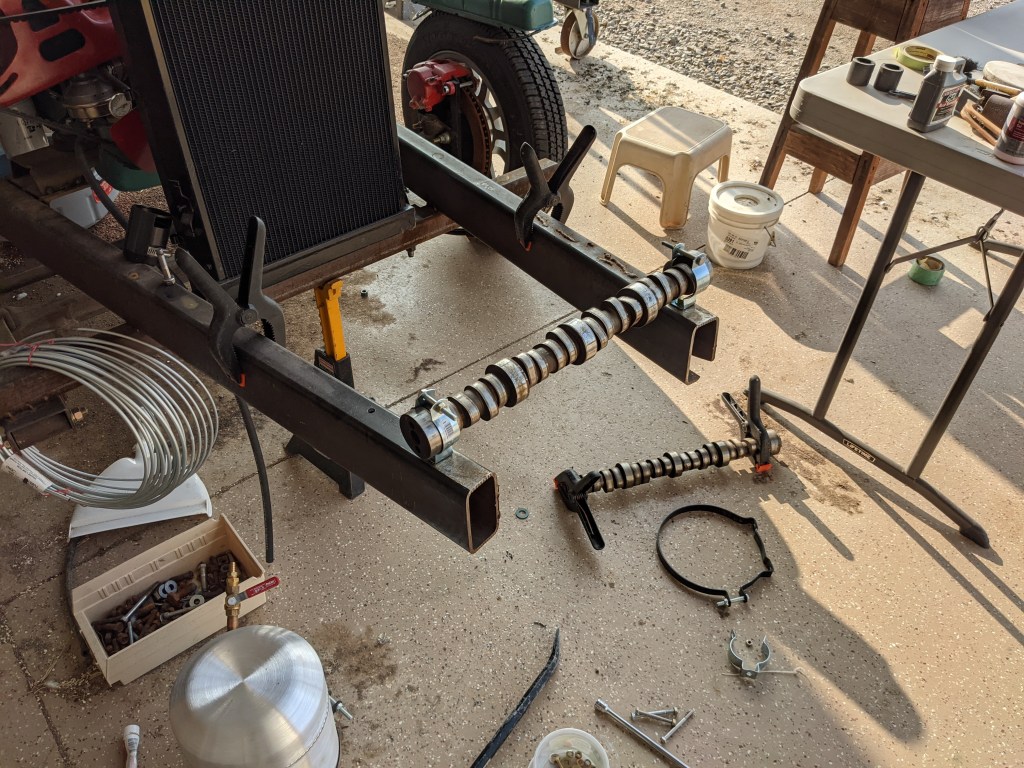
Installed the cam shafts with the fuel tank mount spacing and bolted everything down.
Ran a fuel line from the cut off on the bottom of the tank to the fuel

Headers, Valve Covers and Gas Tank
The headers came back from Ceramic coating


The valve covers are nice and shiny after a polish

I am going to mount the small gas tank on the front but until I get the fenders and grill on I am not sure where it will end up so the mounting location is far forward for now with two camshafts for support


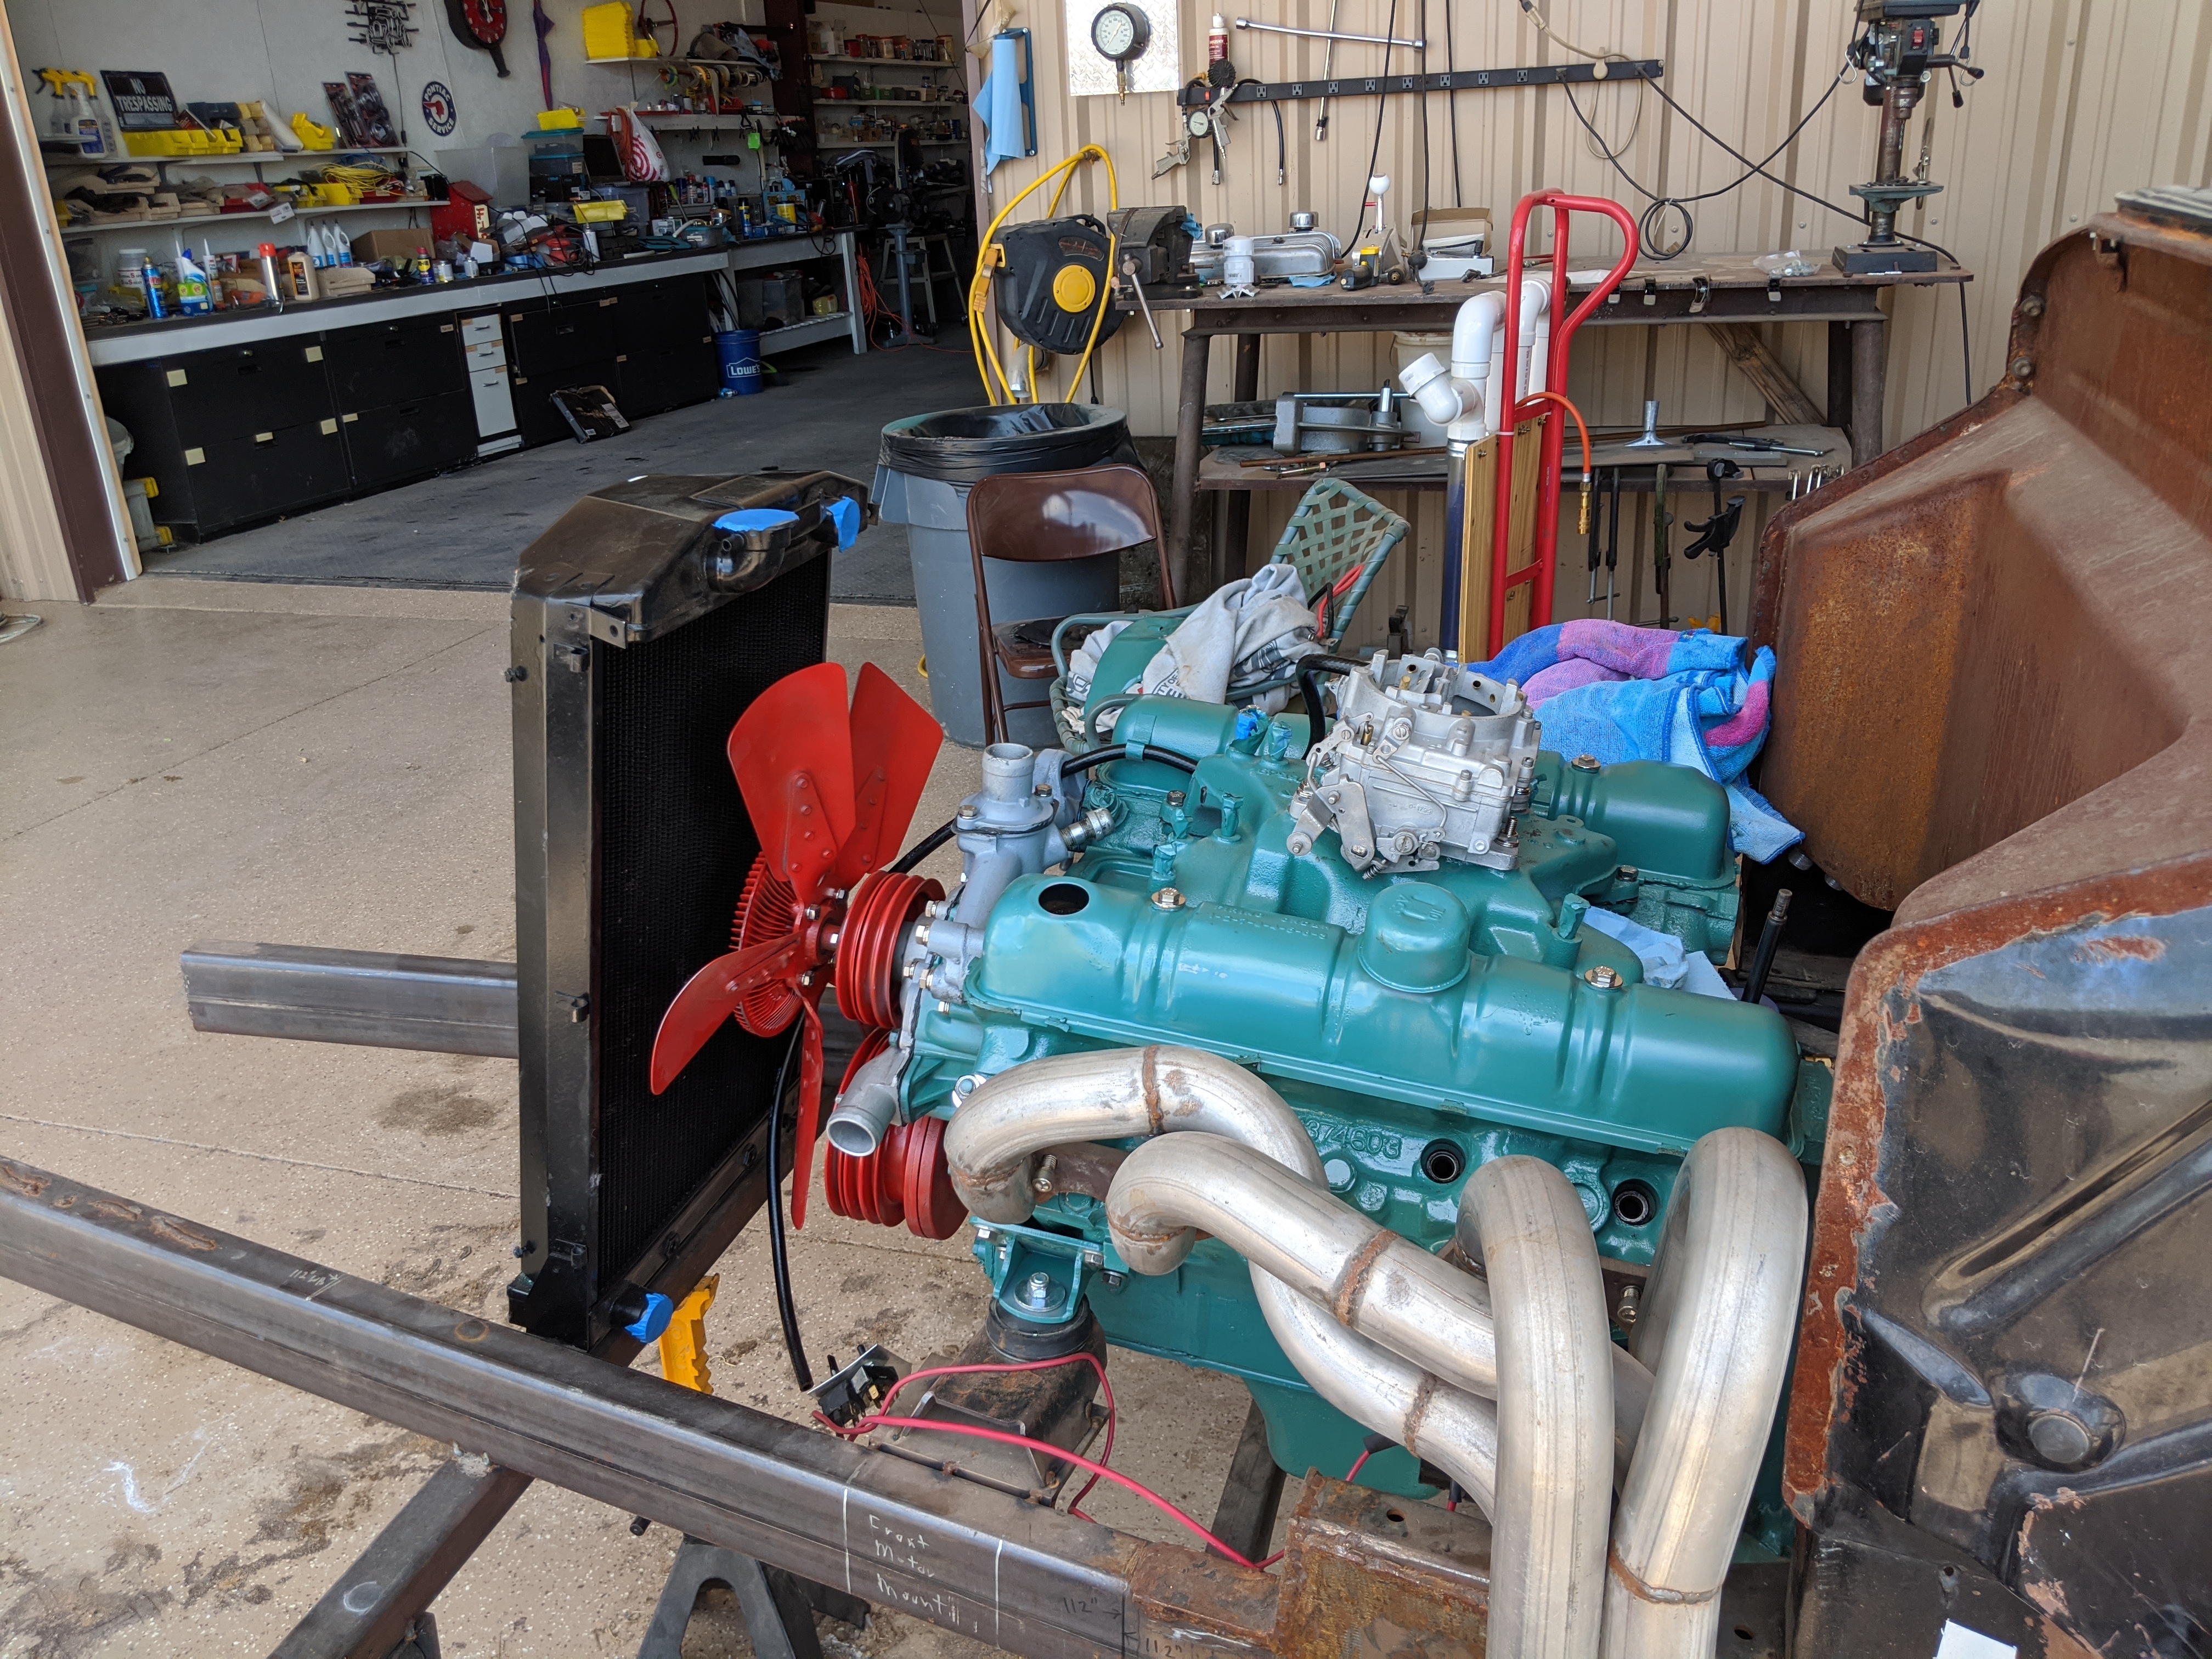
Fluids, Alternator and Coolant Hoses

I painted the alternator mount and installed with fan belt. I put fluids in the engine and transmission in prep for first attempt to make it run

Engine Back in the Frame Rails
With most of the motor back together I wanted to get the engine back in the frame so I could get the headers hung so that I can get some welding done on the 90 degree turn backs and flange adapters before having the headers coated
While the headers are out for ceramic coating I can get the radiator hooked up, the cooler lines for the transmission in, top off all of the fluids, install the distributor, plugs and wiring and a temporary fuel tank.
Engine Prep Front Dress
I installed the all of the front dress items except the alternator including the water pump, cooling cross over, fuel pump, pullies and fan.


Engine Prep Step 6
Because I blasted and sanded the engine block in prep for primer and paint I had sealed off the intake and exhaust ports so before installing the intake manifold I needed to clean up the port surface, take out the paper towels that I had stuffed in the ports and then vacuum out the ports and blow out spark plug holes and give the cylinders another shot of Marviel Mystery Oil before to turn it over again to find cylinder 1’s top dead center. I also need to put some oil back in the pan, run the oil pump to build pressure and then change the oil and filter before I turn it over with the starter and check the compression again.


Engine Prep Step 5
Final coat before I start mounting the front dress, intake, fuel and water pump etc and getting it ready to run again.


