One of the challenges when building an old school Gasser is finding ways to update old drum brakes to modern disk brakes. For the front suspension I found a mid 60’s Chevy G10 van front end complete with springs, axle, and all steering components but the drum brakes were shot.
No disk brake option was available for the van until latter in the 60’s but the entire front end changed and the brake upgrade was not compatible with the mid 60’s units. There are no aftermarket kits made for these vans and even replacement brake drums are not supported so if you want stopping power you have roll your own.
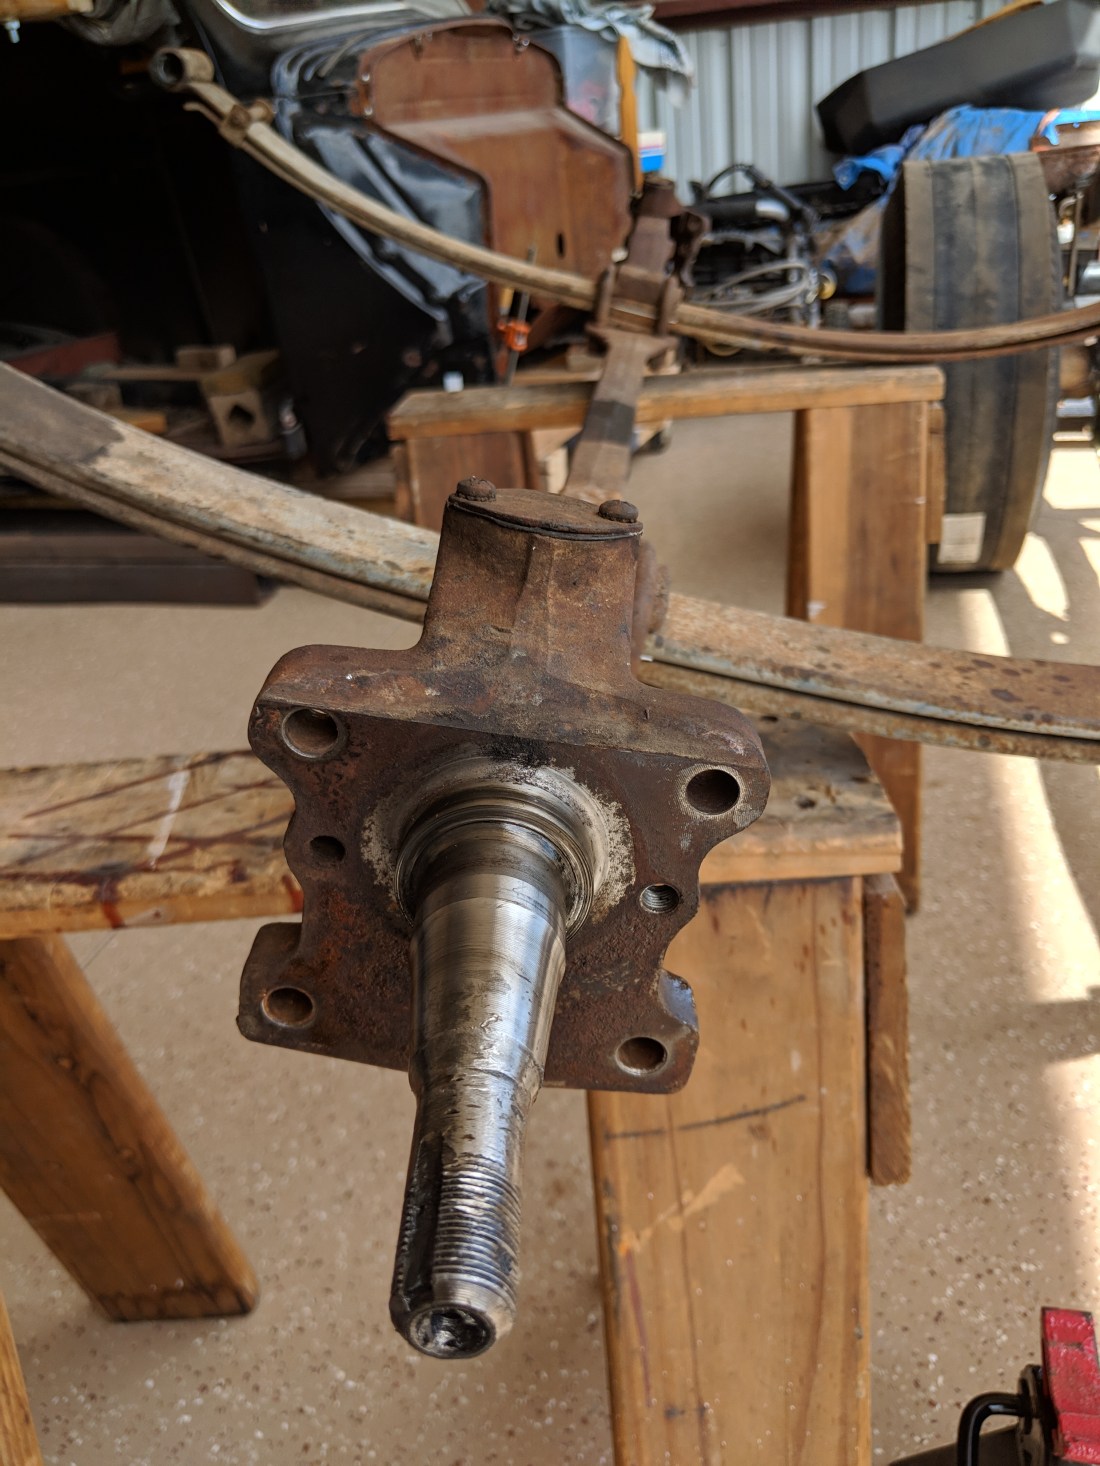
I striped off the drum system down to the steering knuckle and hub and started looking around for components that might work.
Fabrication of a new brake system offers a number of problems that need to be worked through as they arise so I started at the rotor. I had a rear rotor from a trans-am with the right bolt pattern and it did fit the hub but when I went to the next step of finding a caliber (I used a mid 70’s GM single piston unit that was used in the entire GM lineup for years) the caliber did kind of work but because the rotor diameter was only 11″ the caliber did not clear the king pin housing and I could not find a location on the steering knuckle to mount the caliber that did not interfere in some way.\
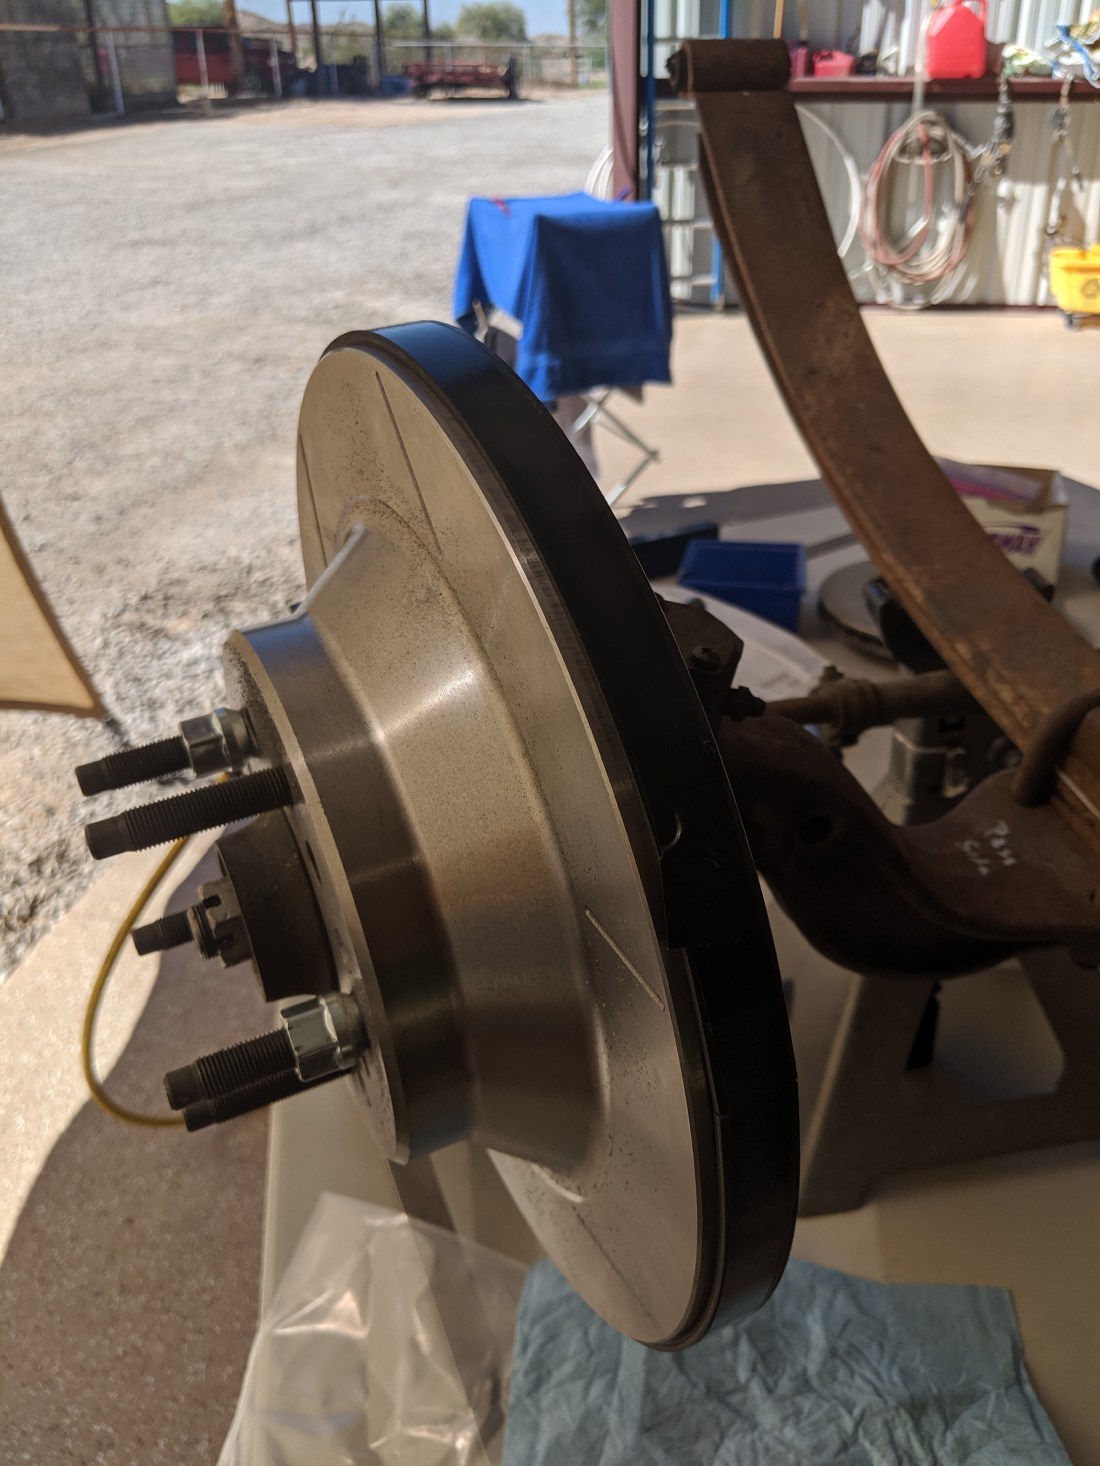
The solution was a larger rotor so I looked around for something larger than 12.5″ that would clear the king pin. The rotor needed to fit the 4.75″ lug bolt pattern and be large enough to provide good stopping power and allow the caliper to mount without interference. I ended up with a Wilwood rotor that was 12.88″ in diameter, 1.11″ thick and had multiple bolt patterns including 4.5 and 4.75″ Not as cheap as the one I already had but it was worth a try so I ordered one from Speedway motors and when I arrived it looked like it might work.

Next issue was getting the caliper seating on the rotor so that I could figure out how to securely attach it to the steering knuckle. I wanted to make sure that the pads had full contact on the face of the rotor but did not sit directly on the rotor. So I used an old serpentine belt and cut it to fit around the rotor so that the caliber would sit about 3/16″ off the rotor, it took two layers and I taped it in place.
I noticed that the caliper was not in the middle of the rotor so I added a 1/4″ spacer to the hub to get in in the middle.

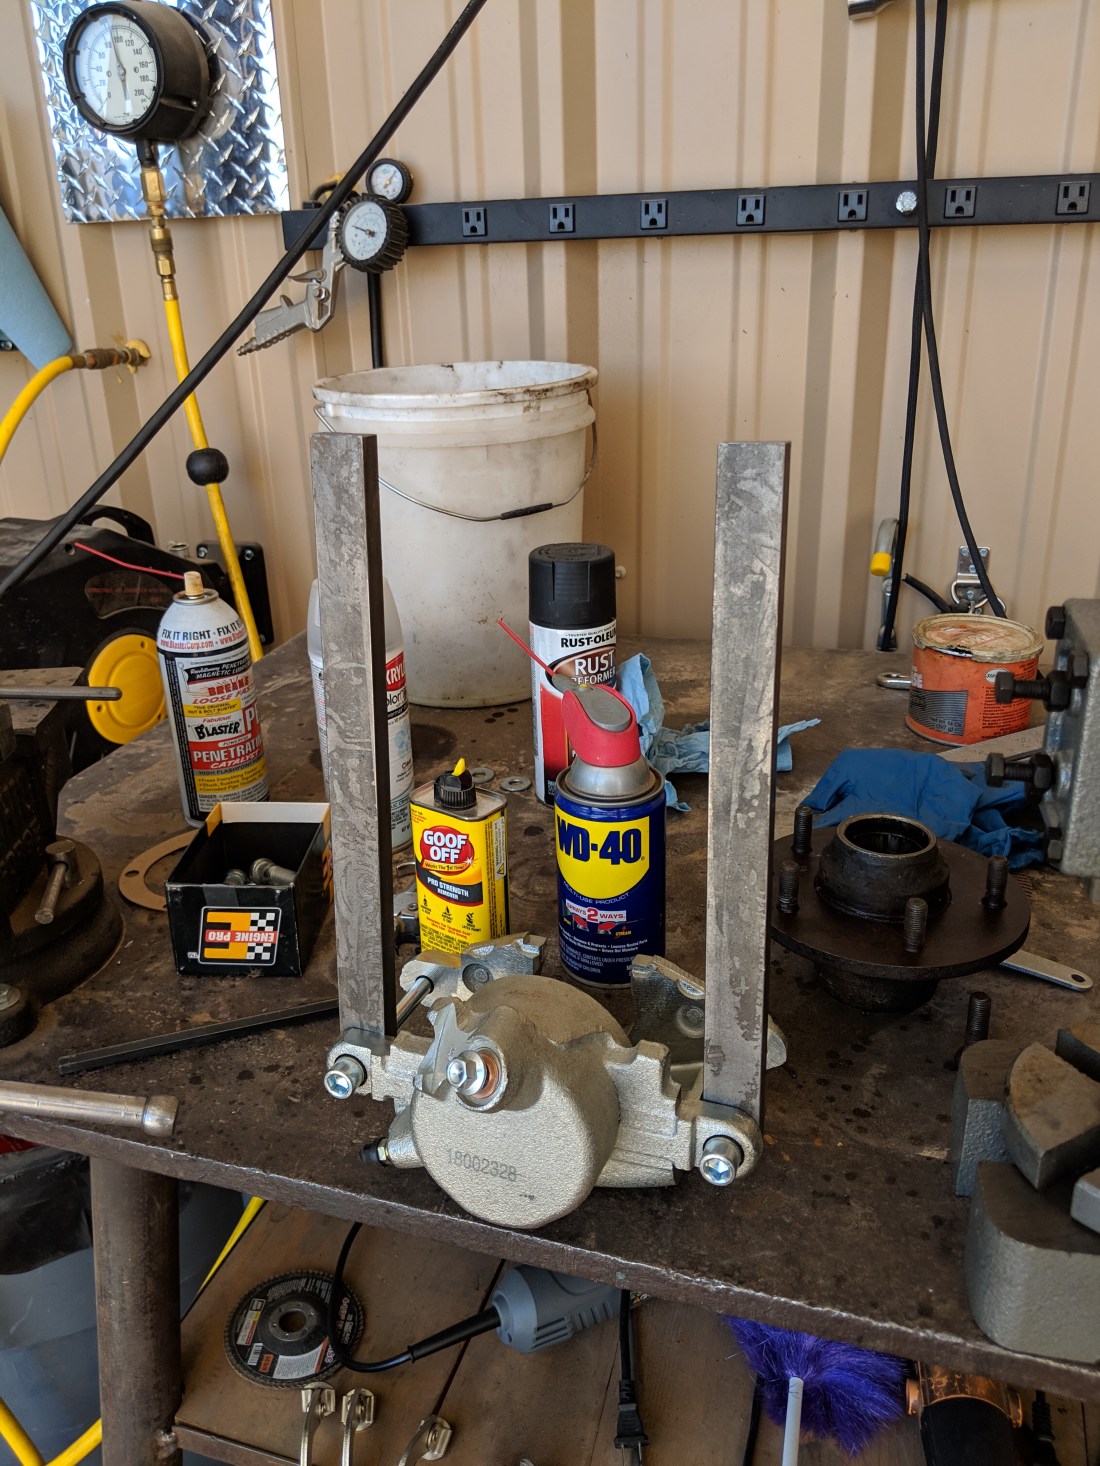
The next issue was how to mount the caliper to the steering knuckle. There would be a lot of force from the caliper when the brakes were applied so it needed to be strong enough to withstand the forces and the heat and be serviceable to allow bleeding and pad changes. The steering arm and the old drum brake backing plate attached to the steering knuckle at 4 points and the caliper mounted with two points so I needed a plan to connect these points together and keep the caliper from moving and not interfere with the steering system.
I used 1/2″ X 12′ bar stock made with high strength steel and I drilled and taped the end of each side so that the caliber would bolt to the bar stock using the factory slide pins on the caliper.
I also upgraded the bolts attaching the steering arms to the knuckle to grade 8 bolts that were 7/16″ X 3′ long..

I fabricated 4 tabs that would bolt to the steering knuckle using the 4 attachment points on the knuckle and by dropping the bar stock straight down I was able to shim, space and cut the tabs so that they could be welded to the bar stock.
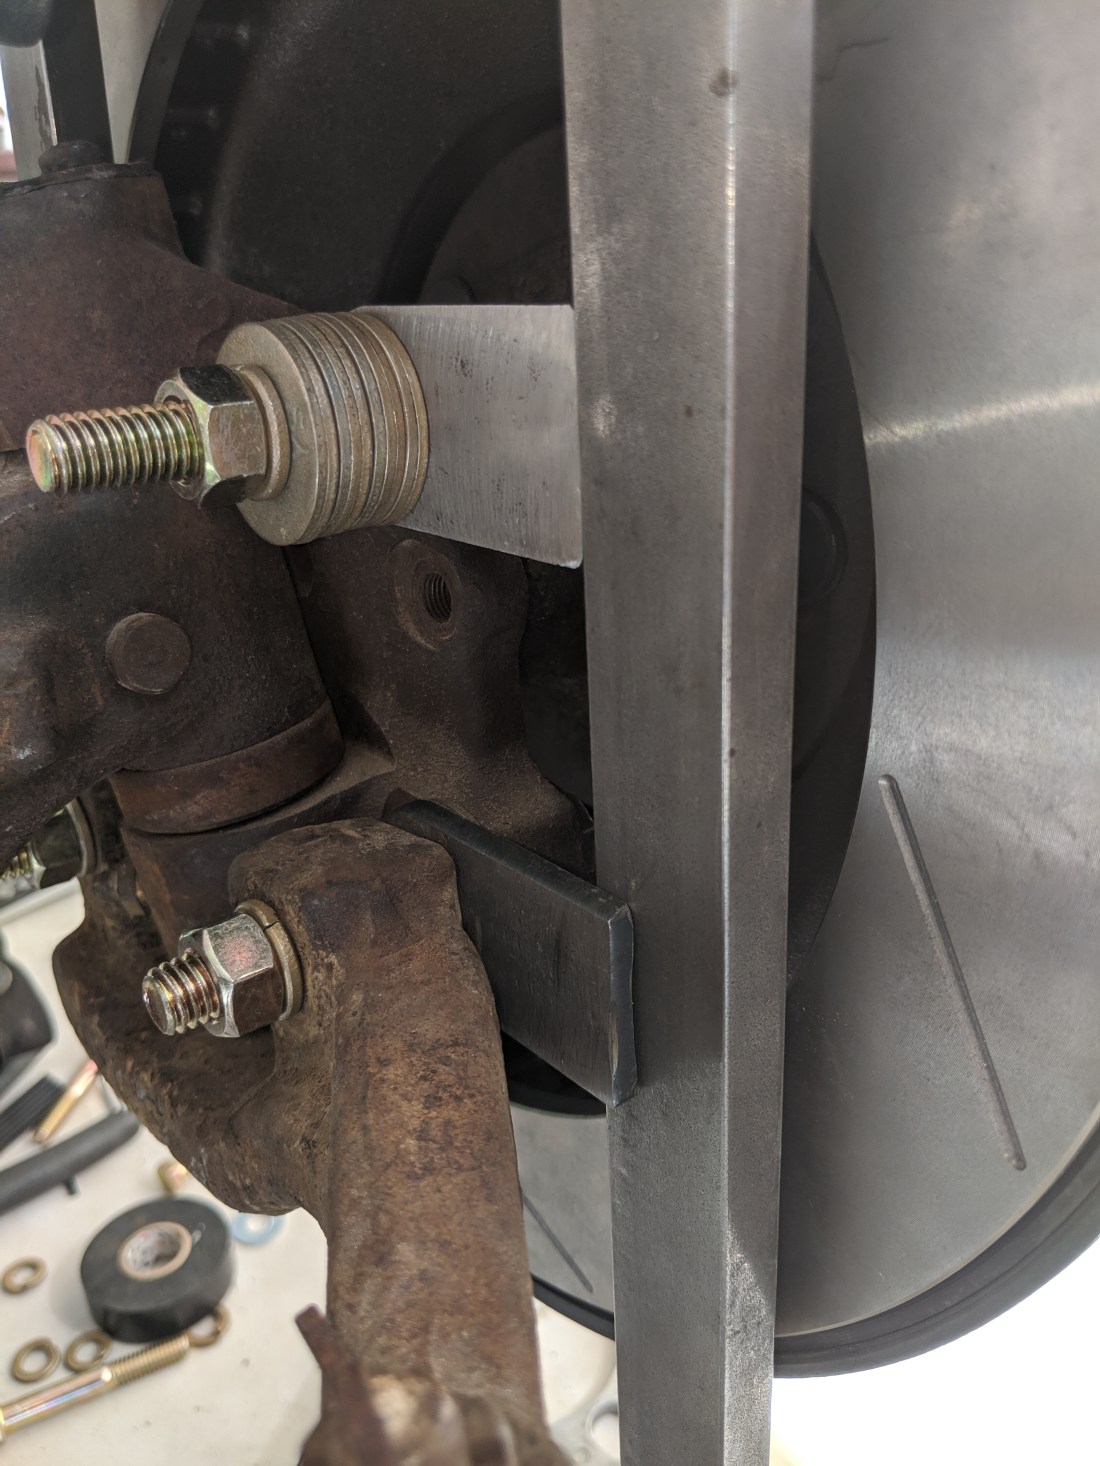
I will tack weld the tabs to the bar stock while everything is bolted up and then remove the entire assembly for final welding and grinding. I will attache the two bars together below the tabs and then cut off any unneeded bar stock length..


