With everything on the rear end in place and tightened up I hung the rear end back on the leaf springs and filled the rear end with lube and checked for leaks.


With everything on the rear end in place and tightened up I hung the rear end back on the leaf springs and filled the rear end with lube and checked for leaks.
I pulled the rear end out one more time to tack weld the disk brake brackets, ladder bar brackets and the leaf spring pad brackets. I also tacked on some gussets I made to support the brackets. I took off the wheels, removed the rotors from the top hats and removed the calibers from the brackets. I also took the axles out to reduce the weight and with everything out of the way I made sure that everything was tack welded on all sides of the brackets.


I loaded up the rear end and delivered it to my welder and his well equipped garage machine shop. Nice set up Ron.


Time to test fit the body on the frame to establish the rear tire clearance to the body and rear fenders.


Because I will need to take the body on and off of the frame often during the build I rebuilt the body dolly and removed the hood, trunk lid and rear fenders to lighten the weight of the body and to allow the center of weight to better balance the center of the lift point for the gantry crane that I will use to test fit the body.


I then flipped the frame over again to finish weld the rear suspension mount points, the rear end brake calibers, the ladder bar mounts and the spring pads and then test fit the body and identify where the tires will end up in relation to the rear fenders.


I was not happy with the shackle kit for the rear leaf springs so I made my own adjustable length shackle plates that moved the rear leaf spring eye up and away from the frame and provided height adjustments to the rear ride height.


When I mounted the wheels and tires with the new rear disk brake kit there was not enough room for the caliber in the wheel. A set of 2″ spacers with 5X5″ bolt pattern solved this problem. I think that the additional rear track width will put the tires outside of the rear fenders but I was expecting that and will add to the old school look with a radius cut in the new fiberglass fenders that I will order to replace the orginal all steel fenders. I will remove and save the fenders off of the body before I do a test fit of the body on the frame.
I will have all of the welds on the frame suspension mounts and rear end housing finished and flip the frame back to check the rear shackle and rear end pinon angles and then move on to the ladder bars and front suspension.


With all of the part and pieces on hand including the cut down axles, the disk brake kit and new axle bearings and seals it was time to finalise the rear end housing onto the frame one last time.
I measured the front leaf spring brackets to make sure that the rear end housing center would be at the correct point on the frame and that the mounts were equal distance from the rear of the frame to ensure that the car would not “crab walk” when complete and I welded the mounts to the frame while using a pipe thru the mounting holes on the front leaf spring brackets so that the leaf springs would be level, centered and would not be binding when completed.
I checked to make sure the the rear end housing was centered in the frame and that the center line of the rear end aligned with the frame in the long axis and then installed the U bolts and and rear end shock brackets and double checked alignments and locations of the rear in the frame. With the rear end housing on the springs I will be able to mount the axles, disk brake top hat and rotors and install the calibers so that the caliber mounts can be correctly spot welded to the rear end housing along with the ladder bar mounts.
I will need to weigh down the rear end before I install and weld in the shackle mounts so that they are at the correct angle with the weight of the car on the springs. I will use a spare Buick Nailhead 401 motor to simulate 500 lbs on each leaf to establish the shackle mounting points.
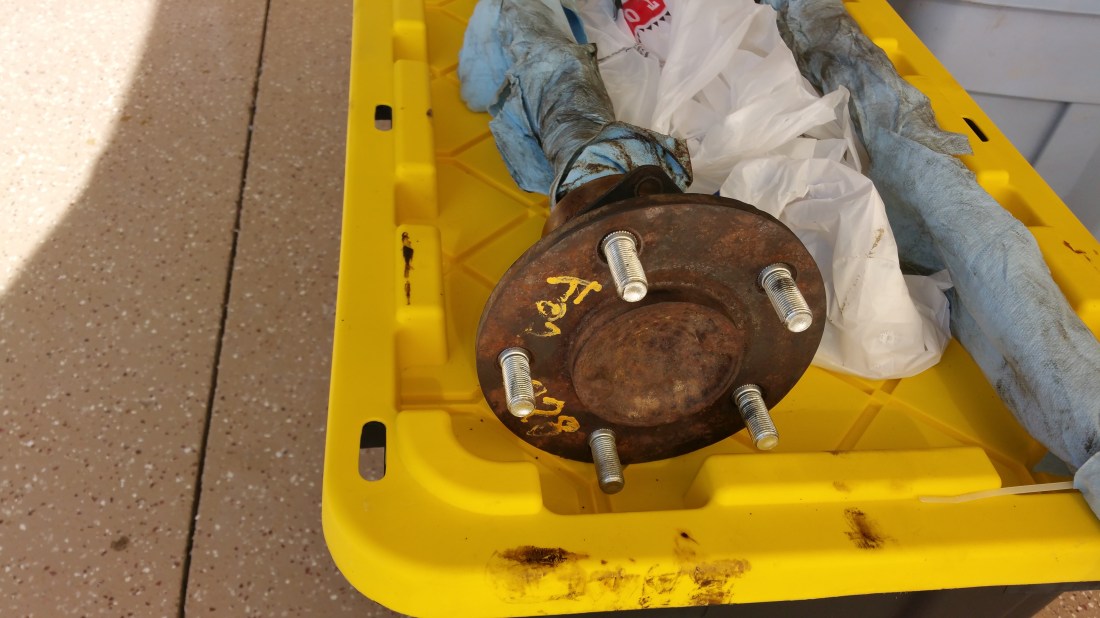
The brake kit from Speedway Motors arrived today and while test fitting the disk rotor hat over the axle I discovered that the axle flange was too large to register inside the hat. The amount need for the parts to fit was only about a 10th of an inch so I took the axles and one of the hats to my trusty machine shop to have the outer diameter of the axles reduced to fit the rotor hats.

I ordered this complete disk brake kit from Speedway Motors. Keeping the rear drum brakes are not an option for the 9.3 rear ends, drums are not available and I had planned to upgrade the brakes in any case. The hat will bolt to the axles and move the rotor inside the rear axle mounting hardware and the brackets will weld to the housing after mounting and aligning the calipers over the rotors. Calipers are common GM 1978-1988 GM one piston units & the rotors are 8.75 inch GM. I hope that there will be room to mount the spring perch brackets without having to move the frame mounts inside the frame rails and still leave room for the weld on ladder bar mounts.
I have not done any welding yet on the rear end housing because I wanted to make sure that I had all of the components first so that I can tack every thing once and bring in a real welder to finish it up. I have a new welder that will do 250 amps MIG but for critical items like suspension I don’t want to experiment with welder settings until I have a feel for the new unit.
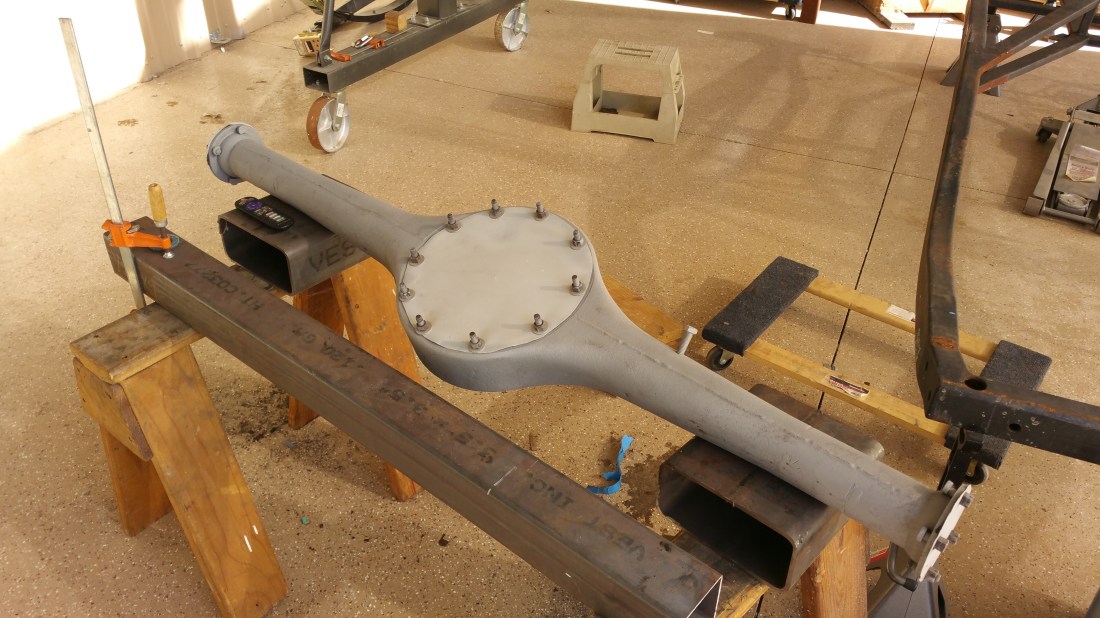
After removing the axles and pumpkin and cleaning out the old lube from the rear end housing I make some covers for the opening in preparation of sand blasting to keep the sand out of the housing and took the housing to Kiwi Sandblasting in Phoenix. The sand blasted housing was ready in one day.
I took the axles down to the local NAPA machine shop and Bill pressed out the old wheel studs and installed the new ones I got on ebay into the axles so that I can finally install the wheels and tires.
I needed to weld on the rear end housing to install the leaf spring pads, ladder bar mounts and the disk brake caliber mounts. All of the items will be close to the axles on the housing so I used weld through primer on the 10 inches closest to the end and primed the rest of the housing with chassis black primer from Eastwood.


The Radir Tri-Bar wheels arrived and I had the slicks mounted and checked the axles to make sure the the wheel bolt pattern was correct.
Over the next week I hope to get the rear end housing blasted and primed before I reassemble the center section and axles. I can then mount the rear end and rear suspension one last time and tack weld the spring mounts on the frame and the rear end housing and test fit the ladder bar axle mounts.
