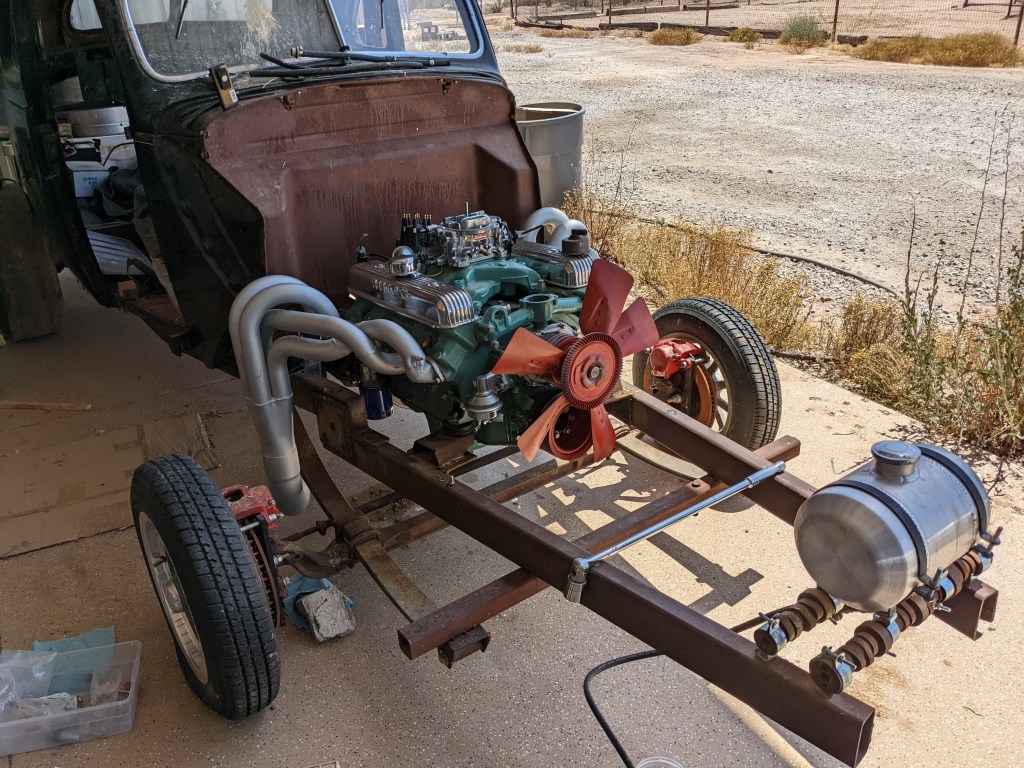
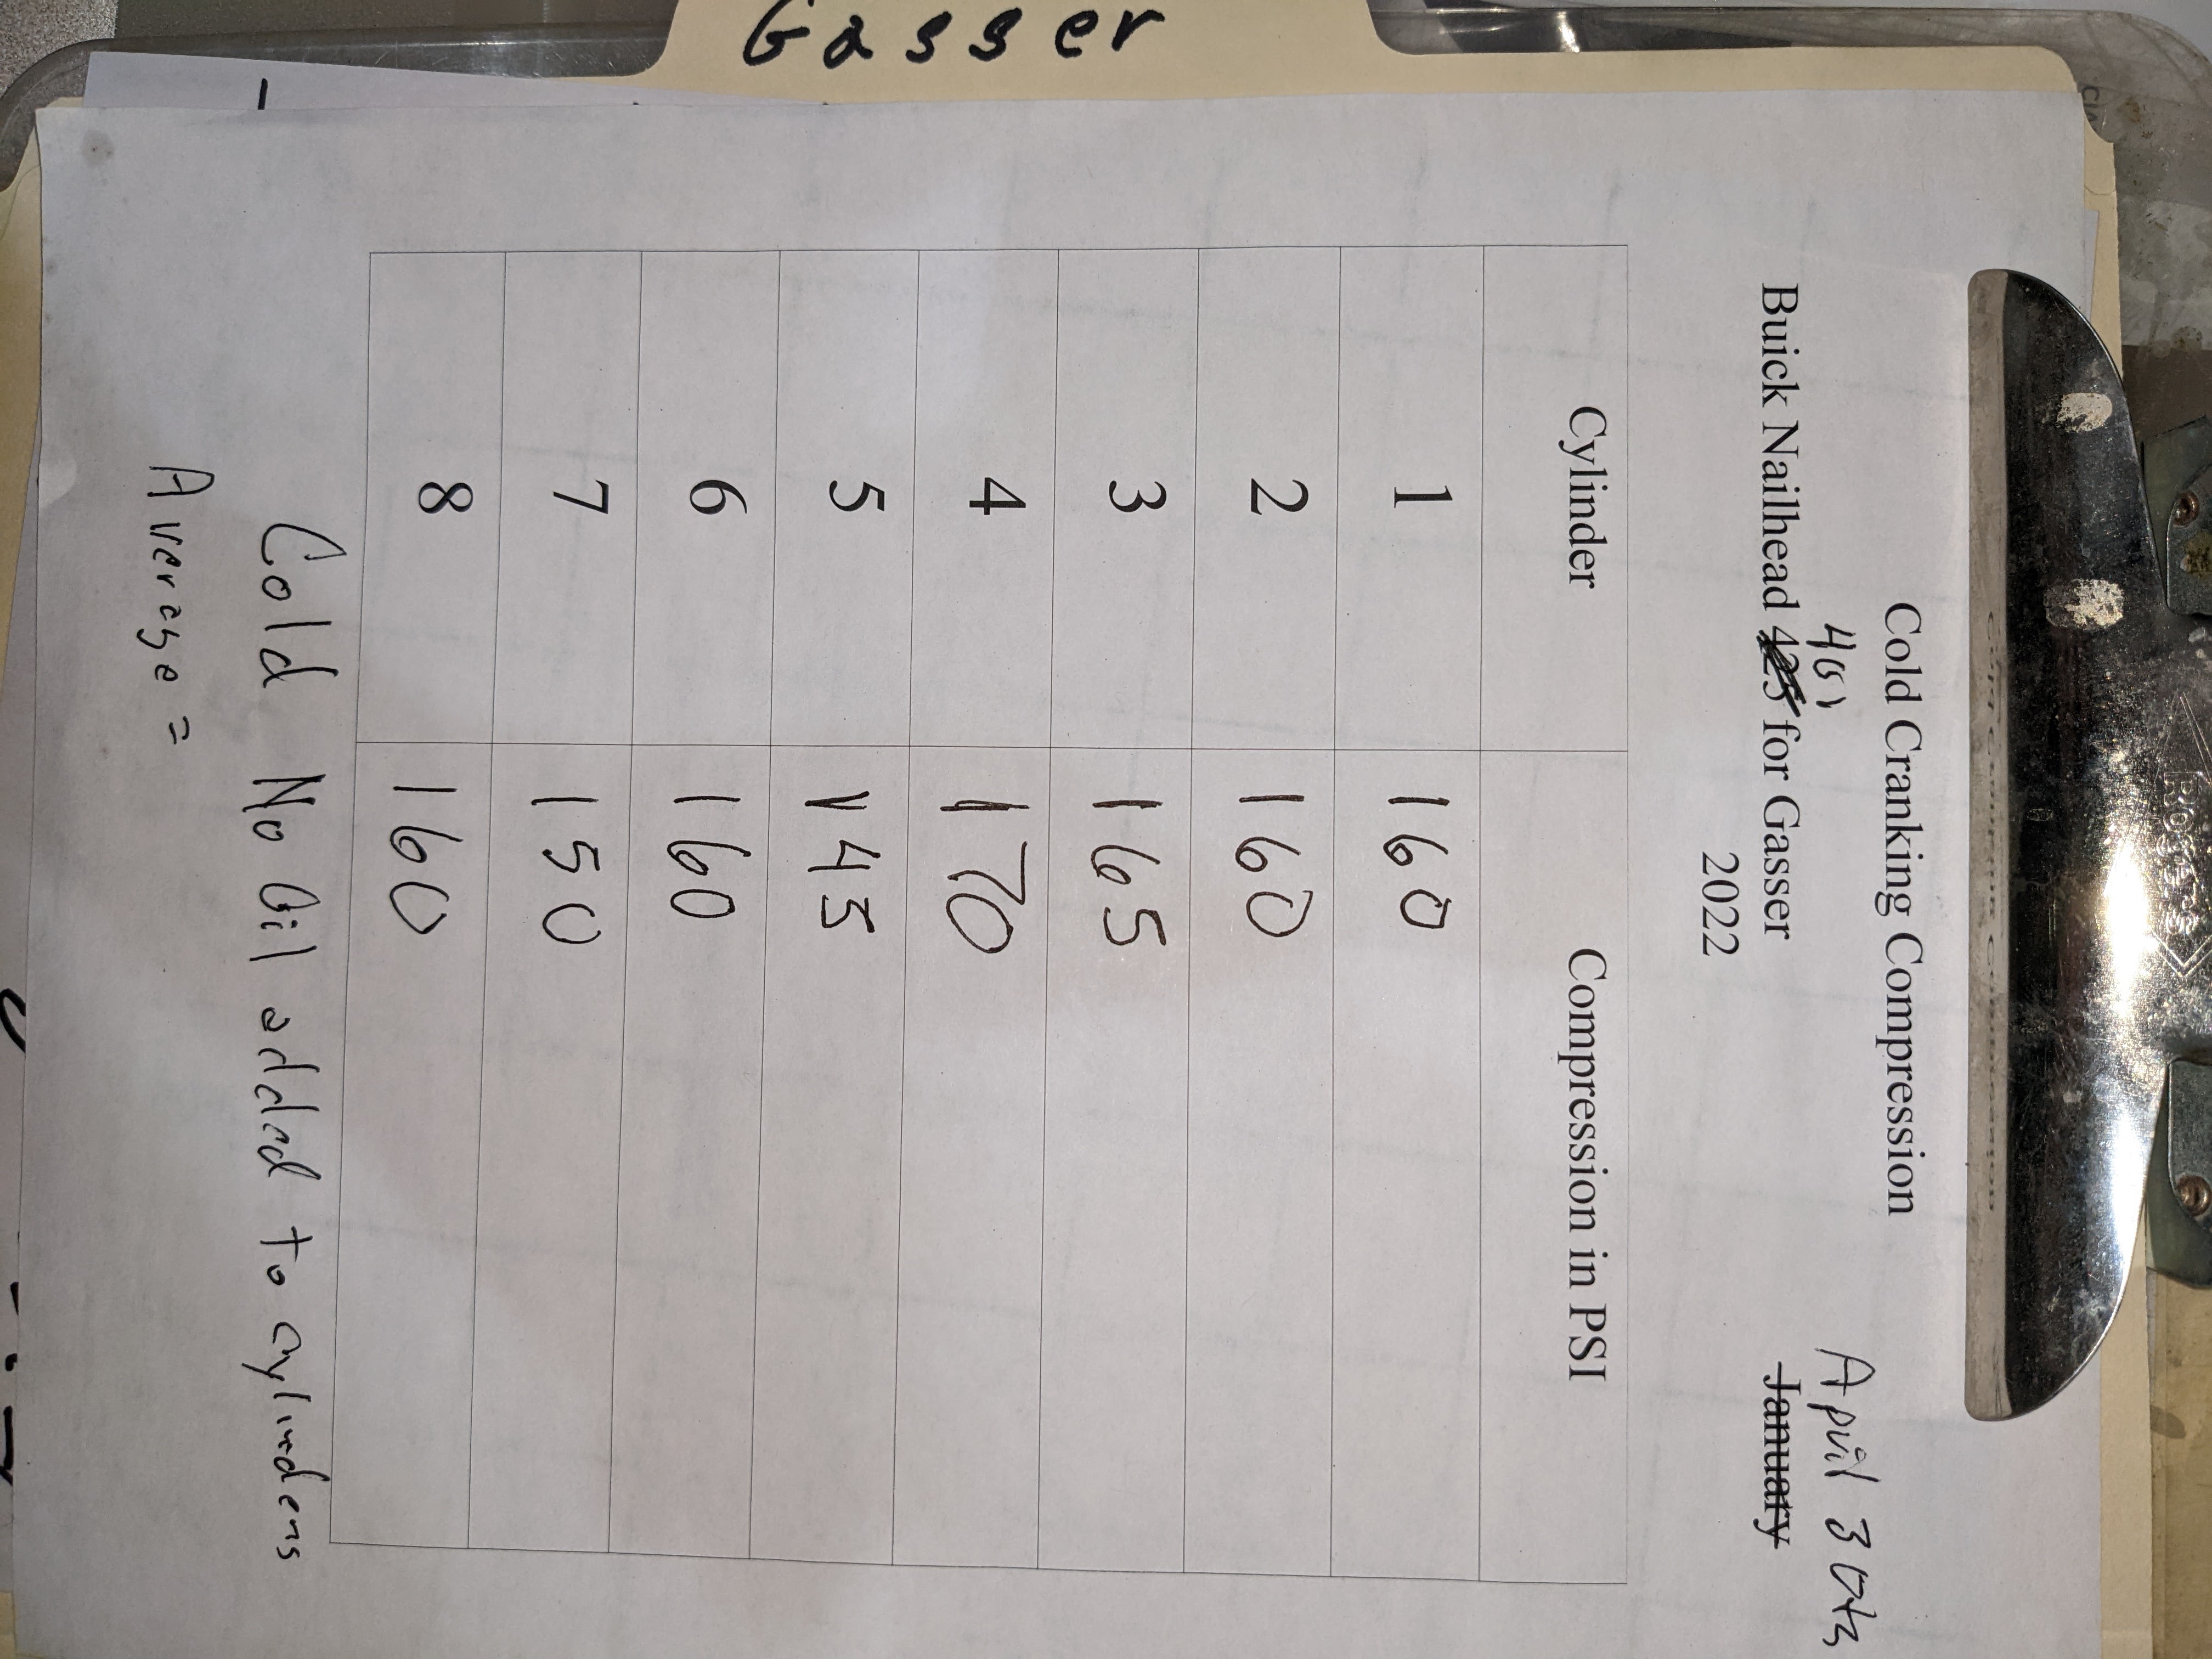
I set the engine # 1 cylinder to top dead center by removing the valve cover and rotating the engine over by hand until the timing was at zero degrees on the harmonic balancer and checking that both the intake and exhaust valves were closed and then I checked the piston with the spark plug out to make sure it was at the top of its stroke. I rotated the engine over another 720 degrees with a pressure gauge just to double check that the #1 was a top dead center on the compression stroke with the valves intake and exhaust both closed.
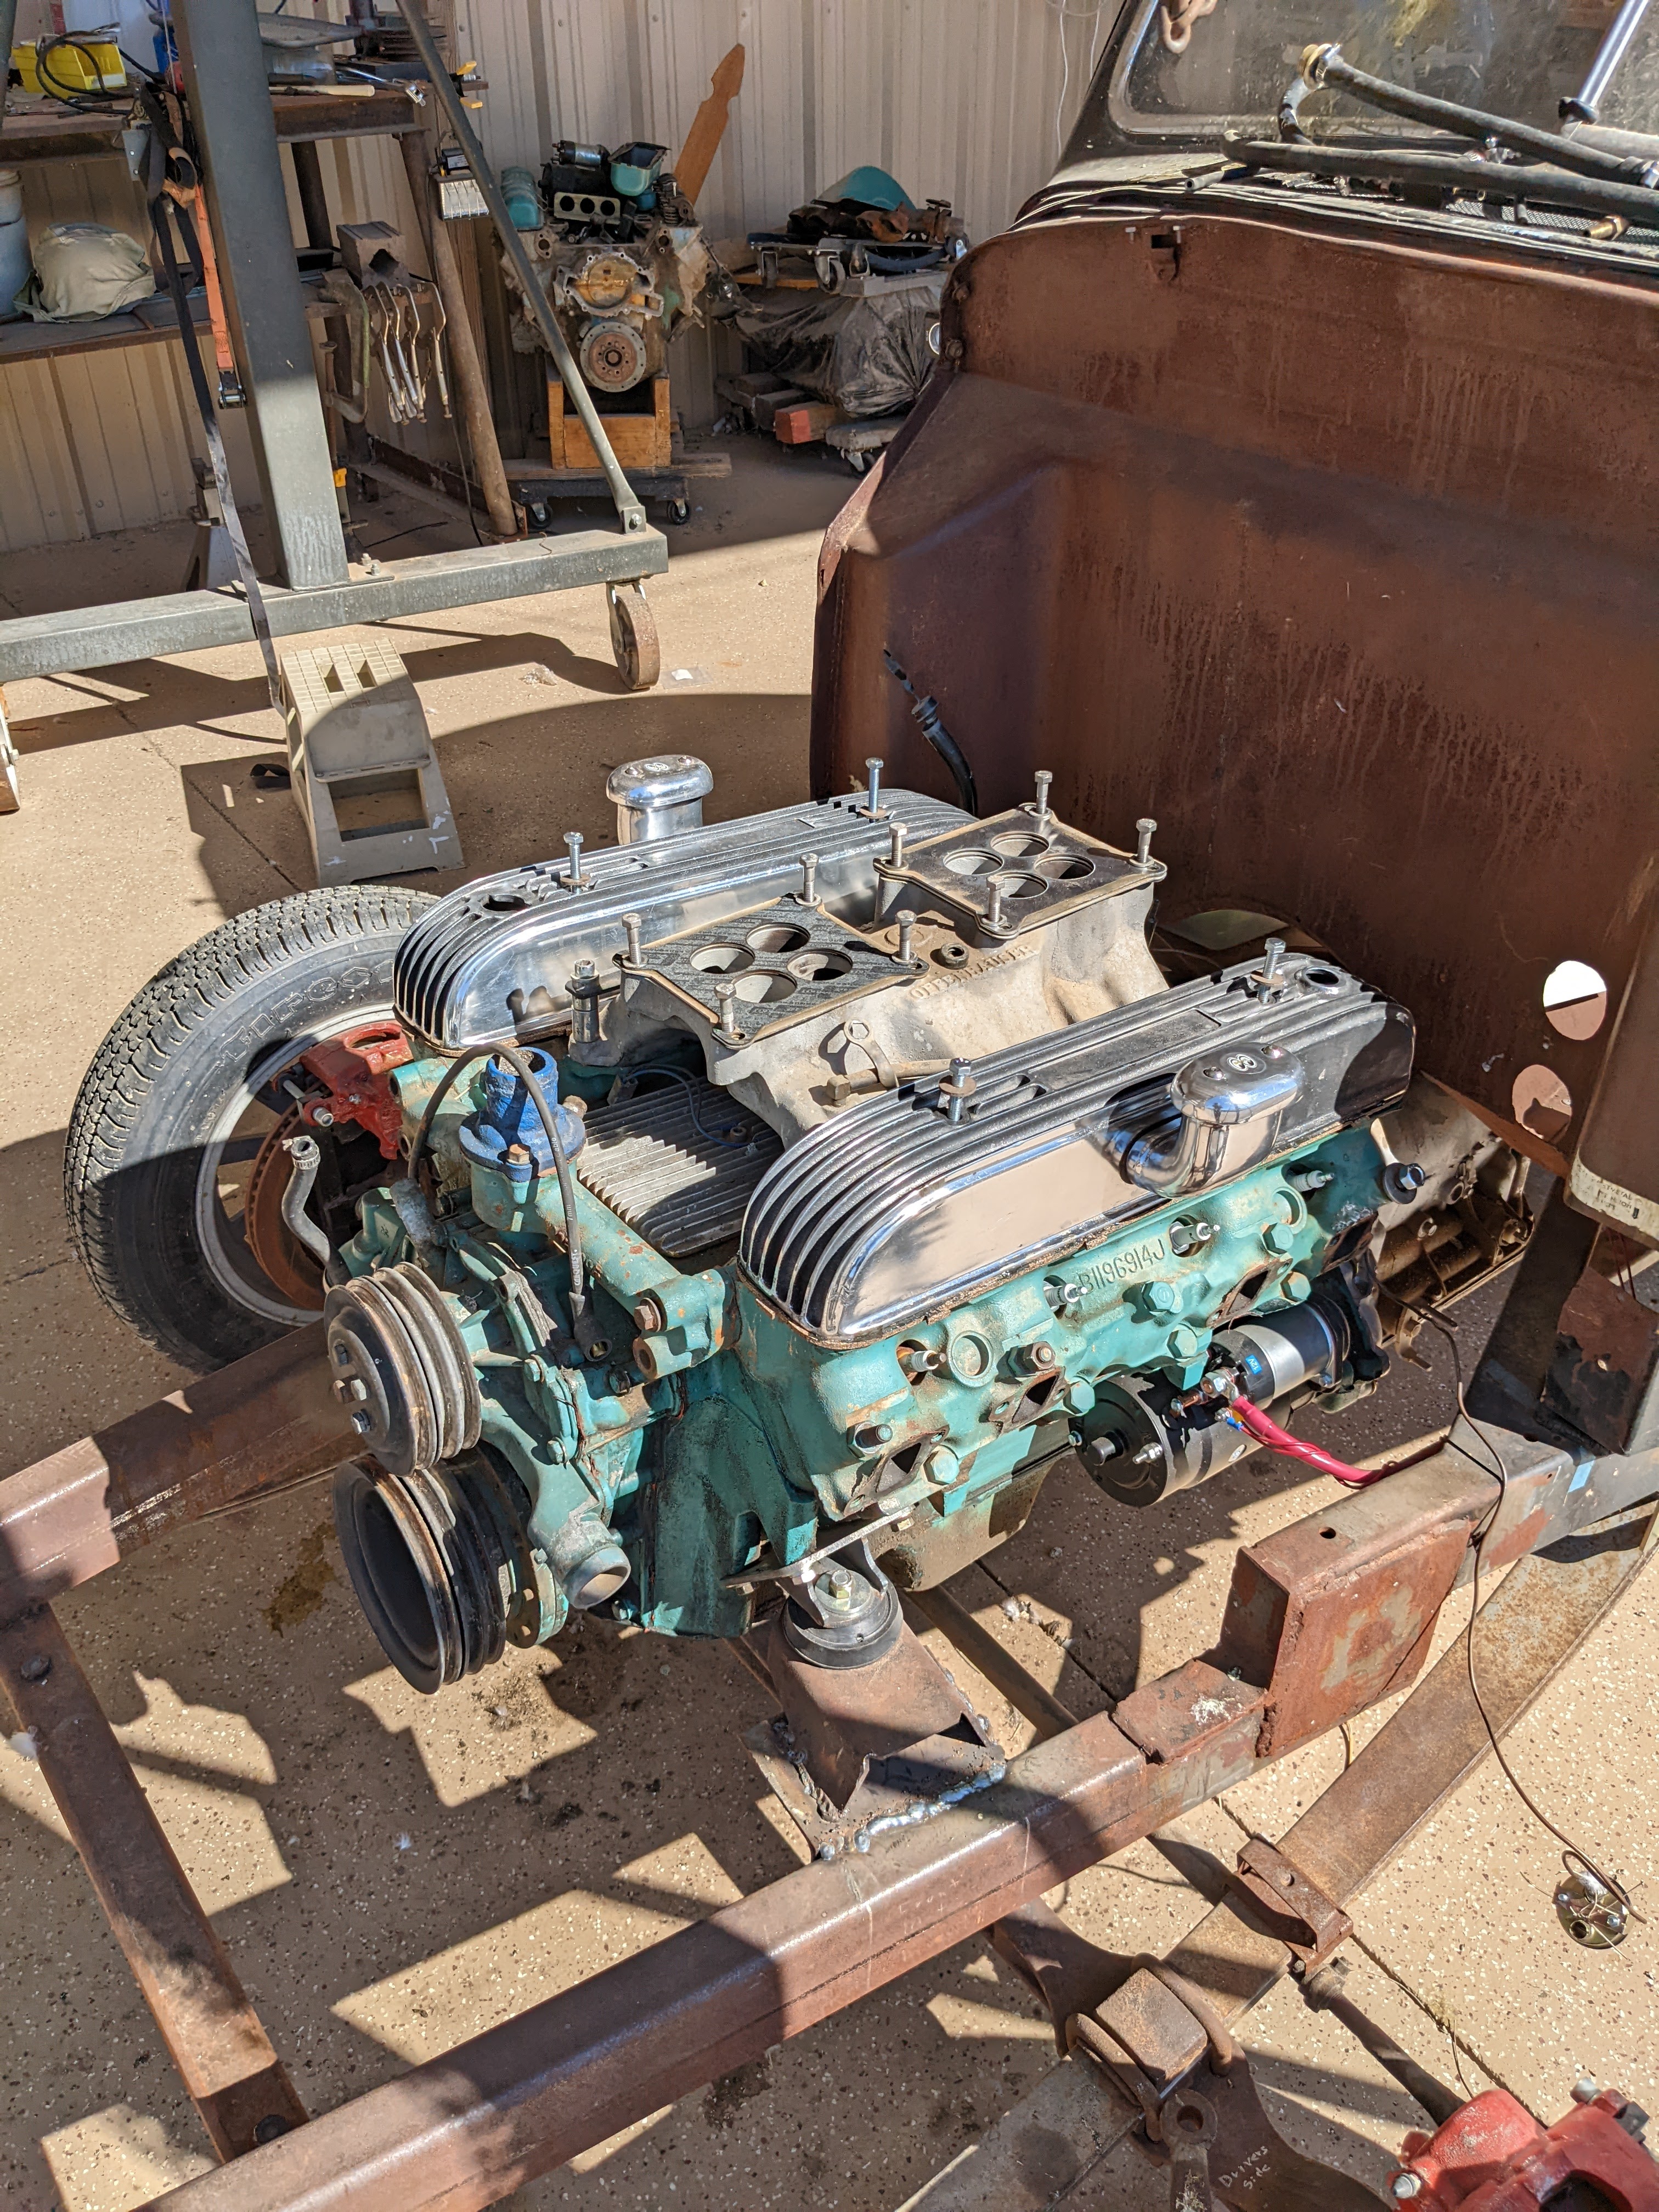
I then installed the distributor and noted where the rotor was, and installed and marked the cap from 1 to 8, installed the plug wires on the cap in order and to the plugs following the firing order for the nail-head engine.
I will need to wire the ignition switch for 12vc to the distributor in the run position and install the coil wiring and ground, the starter wiring is all ready installed and tested